
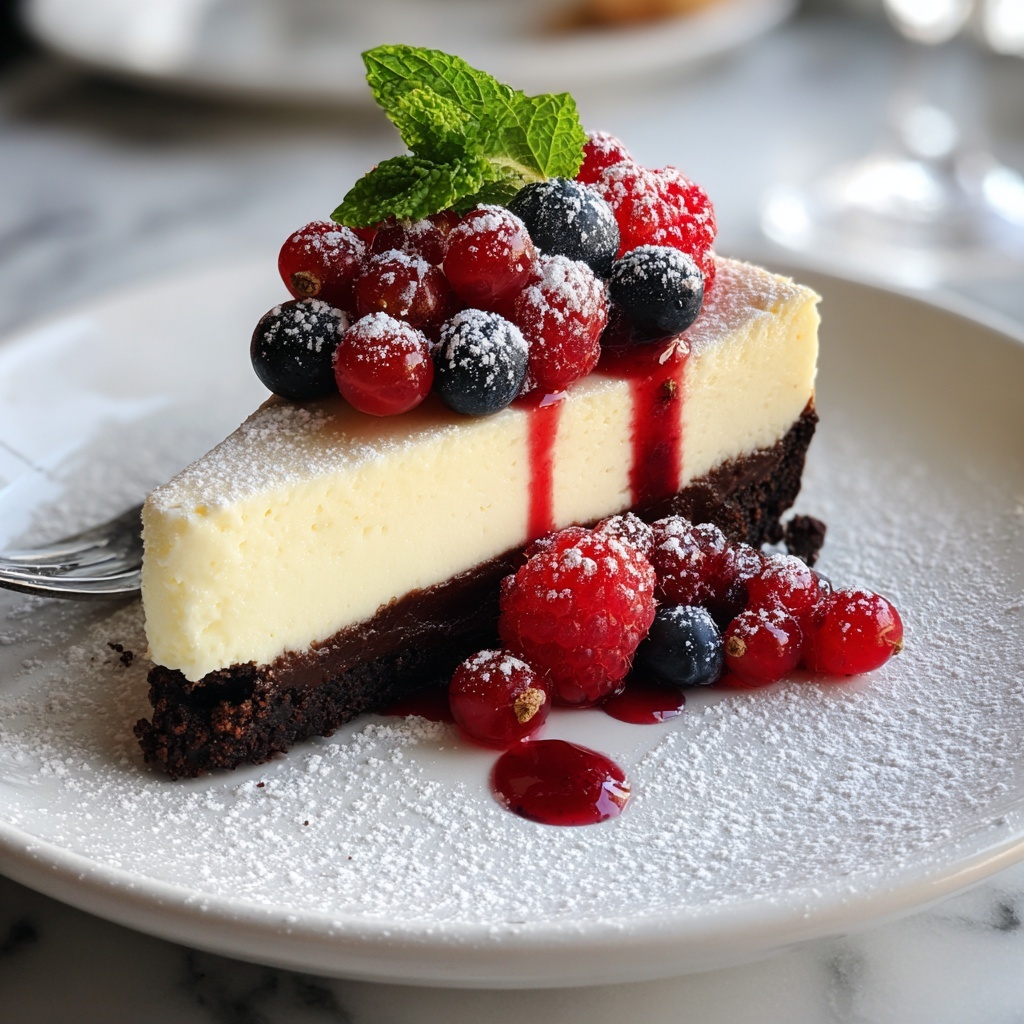
There’s nothing quite as indulgent and satisfying as a velvety, rich cheesecake that melts in your mouth. This Classic New York Cheesecake Recipe captures that iconic creamy texture and perfect balance of tangy and sweet, all nestled on a buttery graham cracker crust. Whether you’re making it for a special occasion or just craving a timeless dessert that feels like a warm hug, this recipe is simple, straightforward, and utterly delicious. Prepare to impress yourself and your friends with the ultimate creamy delight that truly celebrates the best of New York cheesecake traditions.
Ingredients You’ll Need
The beauty of this Classic New York Cheesecake Recipe lies in its simple, quality ingredients that come together to create something spectacular. Each ingredient plays a key role, whether it’s adding richness, creaminess, subtle sweetness, or that perfect texture you crave.
- Graham cracker crumbs: The foundational base that adds a crisp, buttery flavor and texture for the crust.
- Granulated sugar: Used both in the crust and filling to provide the right sweetness level without overpowering.
- Unsalted butter: Melted and mixed with crumbs to bind the crust firmly and impart a subtle richness.
- Cream cheese: The star of the show, softened for a smooth, creamy filling that defines this cheesecake.
- Vanilla extract: Adds warmth and depth to brighten the entire cheesecake flavor.
- Large eggs: Room temperature eggs create a silky, stable structure while keeping the filling lush.
- Sour cream: Adds tanginess and contributes to the cheesecake’s light yet creamy texture.
- All-purpose flour: Helps stabilize the filling so it holds its shape perfectly after baking.
How to Make Classic New York Cheesecake Recipe
Step 1: Prep the Oven and the Crust
Start by preheating your oven to 325°F (163°C). This gradual, moderate heat is crucial to baking the cheesecake gently, avoiding cracks and giving you that signature smooth top. In a mixing bowl, combine the graham cracker crumbs, sugar, and melted butter. Press this mixture evenly into the bottom of a 9-inch springform pan. Pop the crust into the oven for 10 minutes to set, then let it cool. This pre-baked crust forms a sturdy, flavorful foundation that won’t get soggy once the filling hits it.
Step 2: Beat the Cream Cheese Base
Using softened cream cheese, beat it on medium speed until it’s completely smooth and creamy — about 2 to 3 minutes. This step is essential because lumps in your cream cheese will affect the texture of your filling. Stop once it’s perfectly smooth and then slowly add sugar and vanilla extract, beating just until combined. This creates a luscious, sweet base for your cheesecake.
Step 3: Incorporate the Eggs One at a Time
Adding eggs one by one ensures your cheesecake maintains a velvety texture rather than becoming dense or curdled. Beat well after each egg, fully incorporating them before adding the next. This slow introduction helps keep the consistency light and silky while building the cheesecake’s structure from within.
Step 4: Add Sour Cream and Flour
Next, blend in the sour cream and flour into your mixture gently, but thoroughly. The sour cream adds a slight tang and creaminess that balances the sweetness, while the flour stabilizes the filling for that perfect firm-yet-creamy bite. Mixing until smooth here is key to avoid any lumps that could disrupt the texture.
Step 5: Fill and Prepare for Baking
Pour the creamy filling over your cooled crust and gently tap the pan several times on your countertop. This little trick helps remove any air bubbles trapped inside, which can cause cracks. A smooth surface means a beautiful cheesecake to admire once baked.
Step 6: Bake with Patience
Bake the cheesecake for 50 to 60 minutes. You’re looking for the edges to be set and slightly puffed, while the center should be just a little jiggly when you gently shake the pan. Resist the urge to open the oven early — this slow, steady bake makes the cheesecake ultra-creamy without drying it out.
Step 7: Cool Gradually
Once baking is done, crack your oven door open and let the cheesecake sit inside for an hour. This gentle cooling process reduces the risk of cracks and helps the texture set beautifully. Afterward, chill the cheesecake in the refrigerator for at least 4 hours or ideally overnight, so flavors meld and the cheesecake firms up perfectly.
Step 8: Release and Serve
Before serving, run a knife carefully around the pan’s edges to loosen the cheesecake, then remove the springform ring. This final step ensures your cheesecake comes out cleanly with sharp, pristine edges, making it look as fantastic as it tastes.
How to Serve Classic New York Cheesecake Recipe
Garnishes
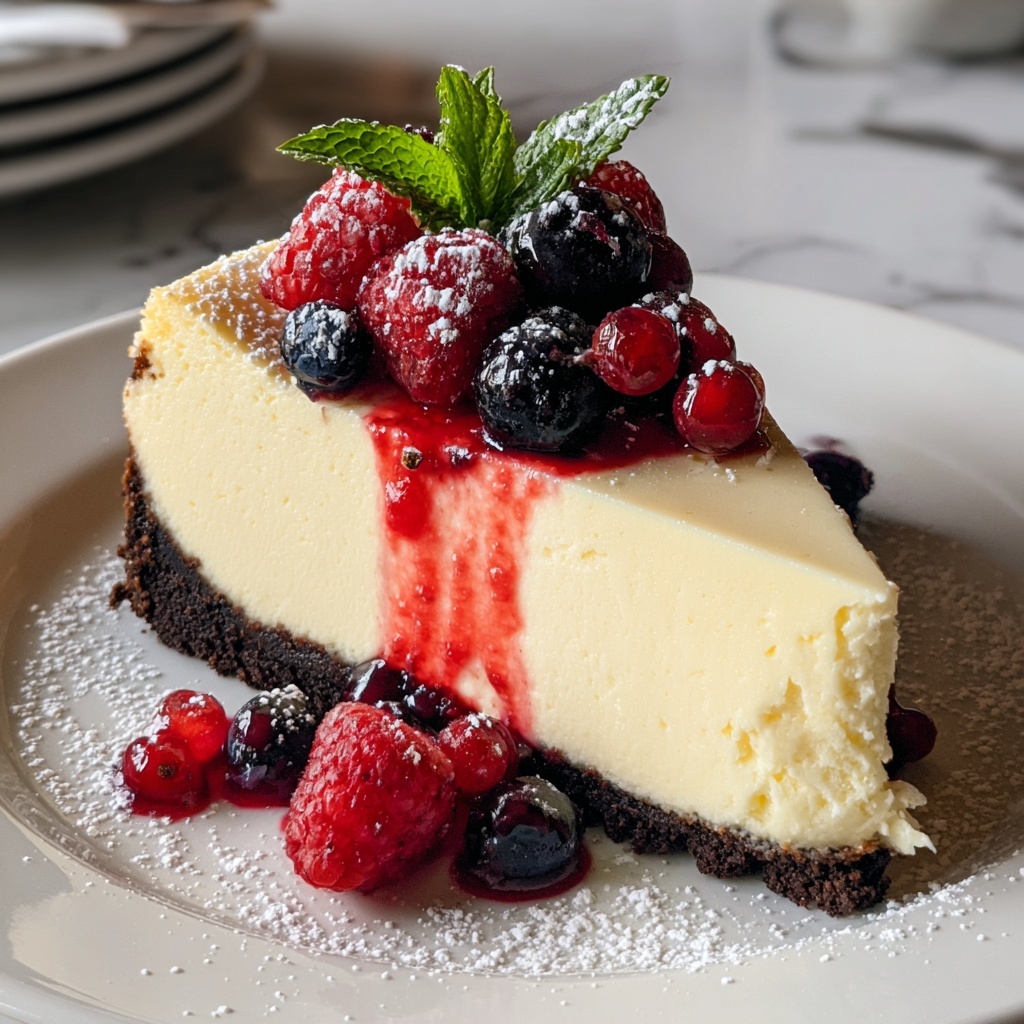
While this classic cheesecake shines on its own, garnishes can elevate it every so slightly. Fresh berries like strawberries, raspberries, or blueberries add a juicy pop of color and tart contrast. A drizzle of rich caramel or a dollop of whipped cream bring an extra touch of indulgence that makes every bite feel like a treat.
Side Dishes
Pair your cheesecake with fresh fruit salad or a scoop of vanilla ice cream for a light complement. If you’re serving this at a gathering, consider offering espresso or a dessert wine alongside — both pair beautifully with cheesecake’s rich flavors.
Creative Ways to Present
Want to get fancy? Present individual cheesecake slices with edible flowers or sprinkle crushed pistachios on top for a nutty texture and elegant look. Alternatively, using small mason jars for single servings of cheesecake layered with fruit compote creates impressive and portable desserts perfect for parties.
Make Ahead and Storage
Storing Leftovers
Classic New York Cheesecake tastes even better the next day, so store leftovers tightly wrapped in plastic wrap or in an airtight container in the refrigerator. It will keep its creamy texture for up to 5 days, making it ideal for prepping ahead or enjoying long after the first slice.
Freezing
If you want to save your cheesecake for longer, you can freeze it. Wrap the cheesecake tightly with plastic wrap, then again with aluminum foil to prevent freezer burn. Frozen cheesecake retains its flavor and texture well for up to 2 months. Thaw it in the fridge overnight before serving to enjoy the same creamy delight.
Reheating
Most cheesecake lovers prefer it cold or at room temperature, but if you want to warm a slice, keep it brief — just a few seconds in the microwave to soften it slightly without melting the structure. This little trick can coax out some flavors while keeping the creamy texture intact.
FAQs
Can I make the crust gluten-free?
Absolutely! Simply substitute the graham cracker crumbs with gluten-free graham crackers or crushed gluten-free cookies. Make sure to check the labels to keep this cheesecake gluten-free without compromising on the buttery, crisp crust.
Why did my cheesecake crack on top?
Cracks usually happen when the cheesecake is overbaked or cooled too quickly. To avoid this, bake at a moderate temperature and cool it gradually by leaving the oven door slightly open before chilling. Also, avoiding overmixing once the eggs are added helps prevent excess air that can crack the surface.
Can I use low-fat cream cheese for this recipe?
While you can, full-fat cream cheese is recommended for that rich, creamy texture classic New York cheesecake is known for. Low-fat versions can sometimes lead to a less smooth, less decadent cheesecake, but it’s still possible if you prefer a lighter option.
How do I prevent the crust from getting soggy?
Baking the crust for 10 minutes before adding the filling helps set it firmly and prevents sogginess. Also, make sure to properly chill the cheesecake before slicing, as that helps the crust retain its structure.
Can I add flavors like lemon or chocolate?
Definitely! Adding a teaspoon of lemon zest or a swirl of melted chocolate can be wonderful variations, but be sure to keep the balance so the classic creamy profile remains the star. Small additions can elevate the cheesecake without overwhelming its signature flavor.
Final Thoughts
This Classic New York Cheesecake Recipe is truly a dessert that never goes out of style. Its creamy, dreamy texture combined with a buttery crust makes it a timeless favorite that’s guaranteed to wow everyone at your table. Don’t hesitate to give it a try — once you taste that perfect slice, you’ll understand why this cheesecake is beloved across the world.
Print
Classic New York Cheesecake Recipe
- Prep Time: 20 minutes
- Cook Time: 1 hour 10 minutes
- Total Time: 5 hours 30 minutes
- Yield: 8-10 servings
- Category: Dessert
- Method: Baking
- Cuisine: American
Description
This Classic New York Cheesecake recipe delivers the ultimate creamy and rich dessert experience. Featuring a buttery graham cracker crust and a smooth, luscious cream cheese filling, it’s baked to perfection for a velvety texture that melts in your mouth. Perfect for any occasion, this cheesecake impresses with its classic flavor and elegant presentation.
Ingredients
Crust
- 1 ½ cups graham cracker crumbs
- ¼ cup granulated sugar
- ⅓ cup unsalted butter, melted
Filling
- 4 packages (8 oz each) cream cheese, softened
- 1 ¼ cups granulated sugar
- 1 tsp vanilla extract
- 5 large eggs, at room temperature
- 1 cup sour cream, at room temperature
- ¼ cup all-purpose flour
Instructions
- Preheat Oven: Preheat your oven to 325°F (163°C) to prepare for baking the crust and cheesecake.
- Make Crust: In a medium bowl, combine graham cracker crumbs, sugar, and melted butter. Press the mixture firmly into the bottom of a 9-inch springform pan. Bake the crust for 10 minutes, then remove from oven and allow it to cool while preparing the filling.
- Prepare Cream Cheese Mixture: Beat the softened cream cheese on medium speed until smooth and creamy, about 2-3 minutes. Add sugar and vanilla extract, mixing until fully incorporated and smooth.
- Add Eggs: Incorporate the eggs one at a time, beating well after each addition to ensure a smooth and even mixture. Then add the sour cream and flour, mixing just until the filling is smooth and no lumps remain.
- Assemble Cheesecake: Pour the cream cheese filling over the cooled crust in the springform pan. Gently tap the pan on the counter to release any trapped air bubbles, which helps prevent cracks in the cheesecake.
- Bake Cheesecake: Place the cheesecake in the preheated oven and bake for 50-60 minutes, or until the edges are set but the center still has a slight jiggle. This ensures the perfect creamy texture.
- Cool in Oven: After baking, turn off the oven and crack the oven door slightly open. Let the cheesecake cool inside for 1 hour to help prevent cracking and allow it to set gradually.
- Chill: Transfer the cheesecake to the refrigerator and chill for at least 4 hours or overnight for best flavor and texture.
- Remove from Pan: Before serving, run a knife around the edges of the pan to loosen the cheesecake, then remove the springform side carefully for a clean presentation.
Notes
- Ensure all dairy ingredients are at room temperature to avoid lumps in the batter.
- Do not overmix the batter once eggs are added to maintain a smooth texture.
- Chilling overnight enhances the flavor and makes slicing easier.
- If desired, a water bath can be used during baking to prevent cracking.
- Use a sharp knife warmed in hot water to slice for clean cuts.


