
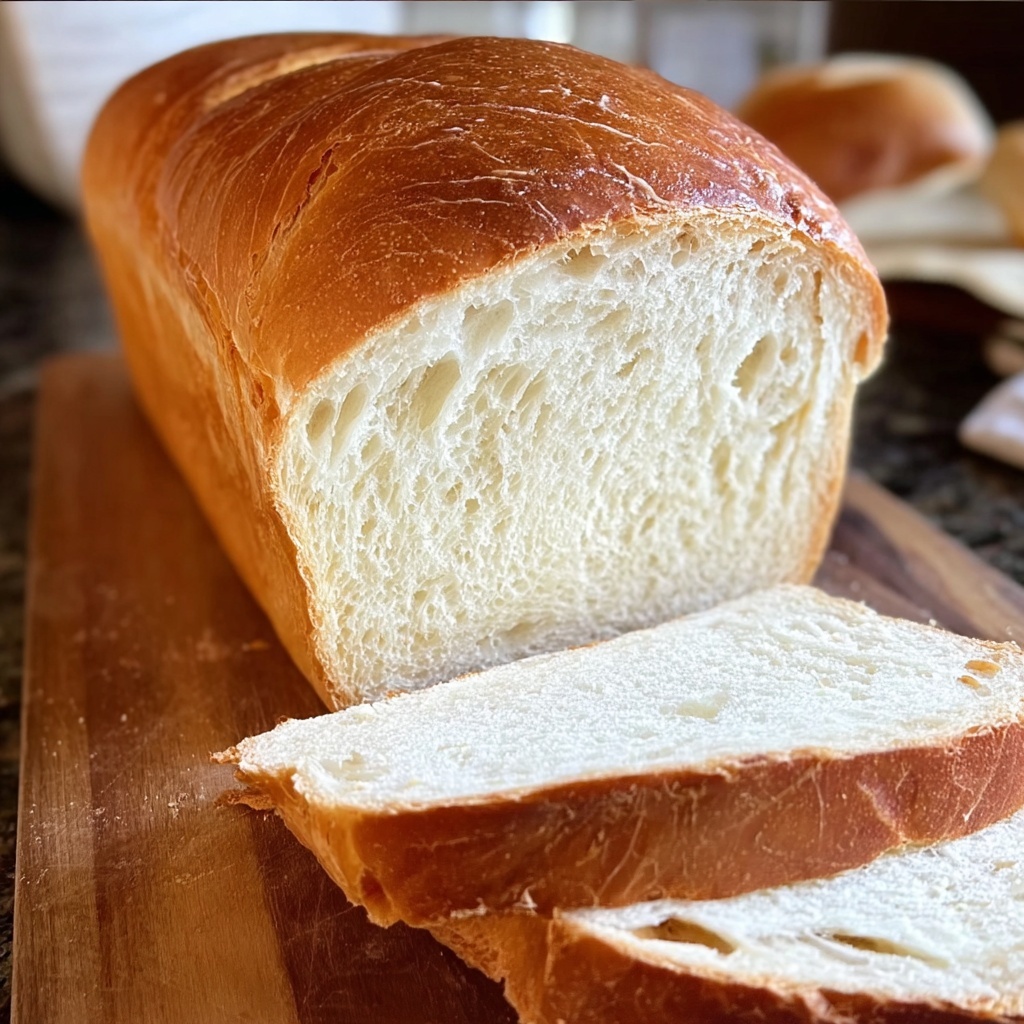
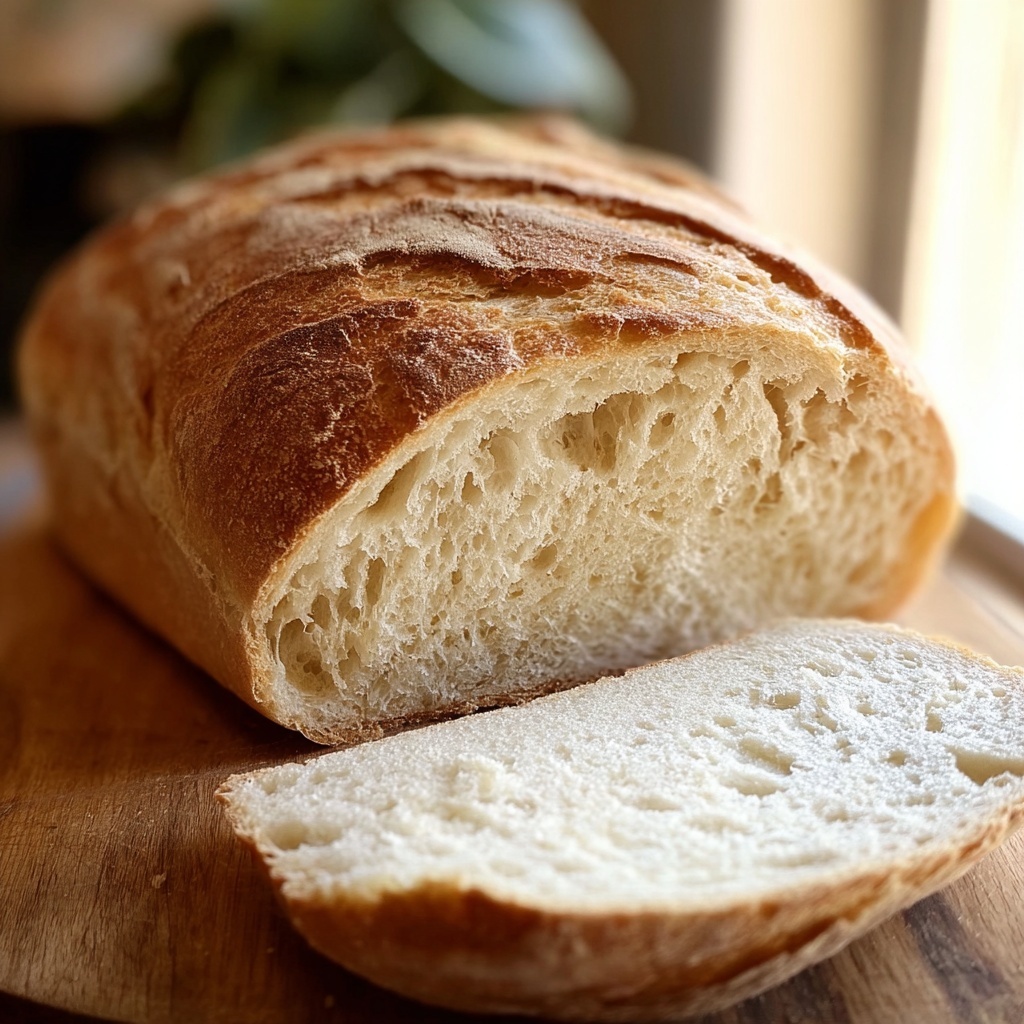
There is something truly magical about the smell of freshly baked bread filling your home, and with this Homemade Classic Bread Recipe, you can experience that joy anytime you want. This recipe combines simple, wholesome ingredients to create a soft, golden loaf with a perfect crust and tender crumb. Whether you’re a novice baker or a seasoned pro, this bread is a rewarding project that yields delicious, comforting results every single time.
Ingredients You’ll Need
These ingredients are delightfully straightforward, yet each one plays a crucial role in creating the texture, flavor, and appearance of your bread. From the active dry yeast giving life to the dough, to the sugar that gently feeds the yeast, every component matters.
- All-purpose flour: The foundation of your bread, providing structure and that perfect chewiness.
- Active dry yeast: The magic agent that makes the dough rise and develop airy texture.
- Warm water (110°F or 45°C): Activates the yeast without killing it, crucial for a good rise.
- Sugar: Feeds the yeast and adds a subtle sweetness to the bread.
- Vegetable oil or melted butter: Adds moisture and richness for a tender crumb.
- Salt: Enhances flavor and strengthens the gluten network.
How to Make Homemade Classic Bread Recipe
Step 1: Activate the Yeast
Start by dissolving the sugar in warm water in a large bowl. Sprinkle the yeast on top and let it sit for 5 to 10 minutes until it becomes frothy and alive. This step is essential because it confirms your yeast is active and ready to give life to your dough.
Step 2: Combine Initial Ingredients
Add the oil or melted butter and salt to your bubbly yeast mixture, then stir in two cups of the flour. This combination begins building the dough’s body and ensures even distribution of fats and seasoning.
Step 3: Form the Dough
Gradually add the remaining flour, half a cup at a time, mixing well after each addition until a soft dough forms. This gradual incorporation helps develop gluten and gives you control over the dough’s texture, avoiding it from becoming too stiff.
Step 4: Knead the Dough
Turn your dough out onto a lightly floured surface and knead it energetically for 8 to 10 minutes. Kneading transforms the dough into a smooth, elastic mass and is key to achieving that satisfying bite in your bread.
Step 5: First Rise
Place the kneaded dough in a greased bowl, cover it with a damp cloth, and leave it in a warm spot to rise until it doubles in size—about an hour. This rising period allows flavors to develop and the dough to puff up beautifully.
Step 6: Shape and Second Rise
After punching down the dough to release air, shape it into a neat loaf and place it into a greased 9-by-5-inch loaf pan. Cover and let it rise again for 30 to 40 minutes until it’s nicely puffed and ready to bake.
Step 7: Bake to Perfection
Preheat your oven to 375°F (190°C). Place the loaf in the oven and bake for 25 to 30 minutes. When baked perfectly, the crust will be golden brown and if you tap the bottom, it should sound hollow—a wonderful sign of a well-baked bread.
Step 8: Cool and Slice
Remove the bread from the pan and let it cool on a wire rack. This step is often overlooked but cooling prevents the bread from becoming gummy when sliced. Wait patiently for your Homemade Classic Bread Recipe to cool before enjoying that first perfect slice.
How to Serve Homemade Classic Bread Recipe
Garnishes
Sprinkle a little sea salt or brush the crust with melted butter right after baking to enhance flavor and shine. For a rustic touch, you can dust the loaf with some whole wheat flour or add seeds before baking.
Side Dishes
This bread pairs wonderfully with savory soups, creamy cheeses, or simple spreads like fresh butter and homemade jam. It’s versatile enough to complement a hearty stew or shine alongside a delicate salad.
Creative Ways to Present
Try slicing the bread thickly and toasting it with garlic butter for a fantastic base for bruschetta or top with avocado and a sprinkle of chili flakes for a modern twist. You can also transform your loaf into croutons or use it for a gourmet grilled cheese sandwich that impresses every time.
Make Ahead and Storage
Storing Leftovers
Keep your leftovers in an airtight container or wrapped tightly in plastic wrap to maintain softness. Stored correctly, this homemade bread will stay fresh at room temperature for about 2 to 3 days—just enough time to enjoy every crumb.
Freezing
If you want to keep your bread longer, freezing is your best friend. Slice the loaf first, then wrap each slice or the whole loaf tightly in plastic and foil to prevent freezer burn. When stored this way, it can last up to 3 months without losing its charm.
Reheating
To bring back that just-baked feeling, thaw frozen slices at room temperature or warm them directly in a toaster or oven. A brief heat-up reawakens the crust’s crunch and the crumb’s tenderness, making it almost as good as fresh from the oven.
FAQs
Can I substitute whole wheat flour in this Homemade Classic Bread Recipe?
Absolutely! You can replace part or all of the all-purpose flour with whole wheat flour. Keep in mind that whole wheat absorbs more water, so you might need to adjust the liquid slightly for the dough to reach the right consistency.
What if my yeast doesn’t foam up during activation?
If the yeast mixture doesn’t become frothy, it could mean your yeast is expired or the water temperature was incorrect. Try again with fresh yeast and ensure water is warm but not hot, ideally around 110°F (45°C).
Is it necessary to knead the dough by hand?
Kneading by hand gives you tactile control and is great for bonding with your dough, but you can also use a stand mixer with a dough hook. Just be sure to knead long enough to develop elasticity.
Why does the bread sometimes turn out dense?
Dense bread can occur if the dough didn’t rise enough, was kneaded too little, or if too much flour was added. Ensure the environment for rising is warm and that you follow the steps carefully for the best airy results.
Can I use this recipe for rolls instead of a loaf?
Yes! Simply divide the dough into smaller portions, shape into balls, and bake them on a lined baking sheet. Reduce the baking time to about 15-20 minutes, or until golden brown on top.
Final Thoughts
Baking this Homemade Classic Bread Recipe is such a rewarding experience that brings warmth and a sense of accomplishment to any kitchen. Once you try it, you’ll realize there’s nothing quite like slicing into a loaf made with your own hands, perfect for any meal or snack. Give it a go, and let your home fill with that irresistible aroma of freshly baked bread!
Print
Homemade Classic Bread Recipe
- Prep Time: 15 minutes
- Cook Time: 30 minutes
- Total Time: 1 hour 45 minutes
- Yield: 1 loaf (approximately 12 slices)
- Category: Bread
- Method: Baking
- Cuisine: American
Description
This homemade bread recipe yields a soft, fluffy loaf with a golden crust, perfect for sandwiches or as a side to any meal. The simple ingredients combine to create fresh bread with a delightful texture and rich flavor, ideal for bakers of all skill levels.
Ingredients
Dry Ingredients
- 3 1/2 cups all-purpose flour
- 1 packet (2 1/4 tsp) active dry yeast
- 2 tablespoons sugar
- 1 teaspoon salt
Wet Ingredients
- 1 1/4 cups warm water (110°F or 45°C)
- 2 tablespoons vegetable oil or melted butter
Instructions
- Activate Yeast: Dissolve sugar in warm water in a large mixing bowl. Sprinkle yeast on top and let sit for 5-10 minutes until frothy, which indicates the yeast is active.
- Combine Ingredients: Add oil or melted butter, salt, and 2 cups of flour to the yeast mixture. Stir to combine, creating a rough batter.
- Form Dough: Gradually mix in the remaining flour, 1/2 cup at a time, until a soft dough forms that is no longer sticky.
- Knead Dough: Transfer dough to a floured surface and knead for 8-10 minutes until it becomes smooth and elastic, which develops the gluten.
- First Rise: Place the dough in a greased bowl, cover with a damp cloth, and let it rise in a warm place for 1 hour or until it doubles in size.
- Shape Dough: Punch down the dough to release air, shape it into a loaf, and place it in a greased 9×5-inch loaf pan. Cover and let it rise again for 30-40 minutes, allowing the loaf to puff up.
- Bake Bread: Preheat the oven to 375°F (190°C). Bake the loaf for 25-30 minutes until the crust is golden brown and it sounds hollow when tapped.
- Cool and Serve: Remove the bread from the pan and cool it on a wire rack completely before slicing to maintain texture and prevent gummy slices.
Notes
- Use warm water at about 110°F (45°C) to activate the yeast without killing it.
- Kneading time is important for gluten development; under-kneading can result in dense bread.
- Letting the dough rise properly ensures a light and airy crumb.
- You can substitute vegetable oil with melted butter for a richer flavor.
- Store the bread in an airtight container for up to 3 days or freeze for longer storage.


