If you have been searching for a crispy, flavorful dish that delivers a perfect balance of crunch and tang, let me introduce you to this fantastic Chicken Katsu with Homemade Katsu Sauce Recipe. This Japanese-inspired comfort food takes juicy chicken breasts, coats them in a crispy panko crust, and pairs them with a tangy, savory sauce that you whip up from kitchen staples. The combination is irresistible and surprisingly easy to make, making this recipe a guaranteed crowd-pleaser any day of the week.
Ingredients You’ll Need
Before diving into the cooking process, let’s talk about the simple yet essential ingredients that make this Chicken Katsu with Homemade Katsu Sauce Recipe truly shine. Each component contributes to the dish’s irresistible texture and rich flavor, from the crunchy panko coating to the vibrant homemade sauce that ties everything together.
- Boneless, skinless chicken breasts: Choose fresh, even-thickness breasts for perfect cooking and tender juiciness.
- All-purpose flour and cornstarch: These help create a light, crispy coating that sticks beautifully to the chicken.
- Egg and water: This classic wash ensures the panko crumbs adhere evenly for that signature crunch.
- Panko breadcrumbs: The key to crispiness—these Japanese-style crumbs give you a light, airy texture unlike ordinary breadcrumbs.
- Garlic salt, black pepper, and ground ginger: A trio that infuses the breading with subtle spice and savory notes.
- Vegetable oil: Perfect for frying, it provides a neutral flavor and high smoke point.
- Ketchup, Worcestershire sauce, brown sugar, oyster sauce, and garlic salt (for the sauce): These pantry heroes combine to make a tangy, sweet, and deeply flavorful katsu sauce you’ll want to drizzle on everything.
How to Make Chicken Katsu with Homemade Katsu Sauce Recipe
Step 1: Prepare the Chicken
Start by trimming your chicken breasts so they have an even thickness. This helps them cook uniformly, ensuring every bite is juicy and tender. Pat them dry with paper towels; this step is crucial because excess moisture can prevent the breading from sticking properly.
Step 2: Make the Katsu Sauce
This homemade katsu sauce is the heart of the recipe and incredibly easy to create. Simply whisk together ketchup, Worcestershire sauce, brown sugar, oyster sauce, and a pinch of garlic salt in a bowl until smooth and well combined. The sauce balances sweet, tangy, and savory notes that perfectly complement the crunchy chicken.
Step 3: Bread the Chicken
Set up three separate trays: one with a mixture of flour and cornstarch, another with beaten egg and water, and a third with panko breadcrumbs, garlic salt, black pepper, and ground ginger. Coat each chicken breast first in the flour mixture to give a dry base, then dip in the egg wash, and finally press firmly into the seasoned panko crumbs. This triple-layer technique creates that much-loved crunchy crust.
Step 4: Fry the Chicken
Heat vegetable oil in a skillet or deep pot until it reaches 350°F (175°C). Carefully add the breaded chicken breasts and fry for about 4 minutes on each side until they turn a gorgeous golden brown. To ensure safety and perfect texture, the internal temperature should reach 165°F. Drain the cooked chicken on paper towels or a wire rack to keep the crust crisp and free of excess oil.
Step 5: Serve Hot with the Katsu Sauce
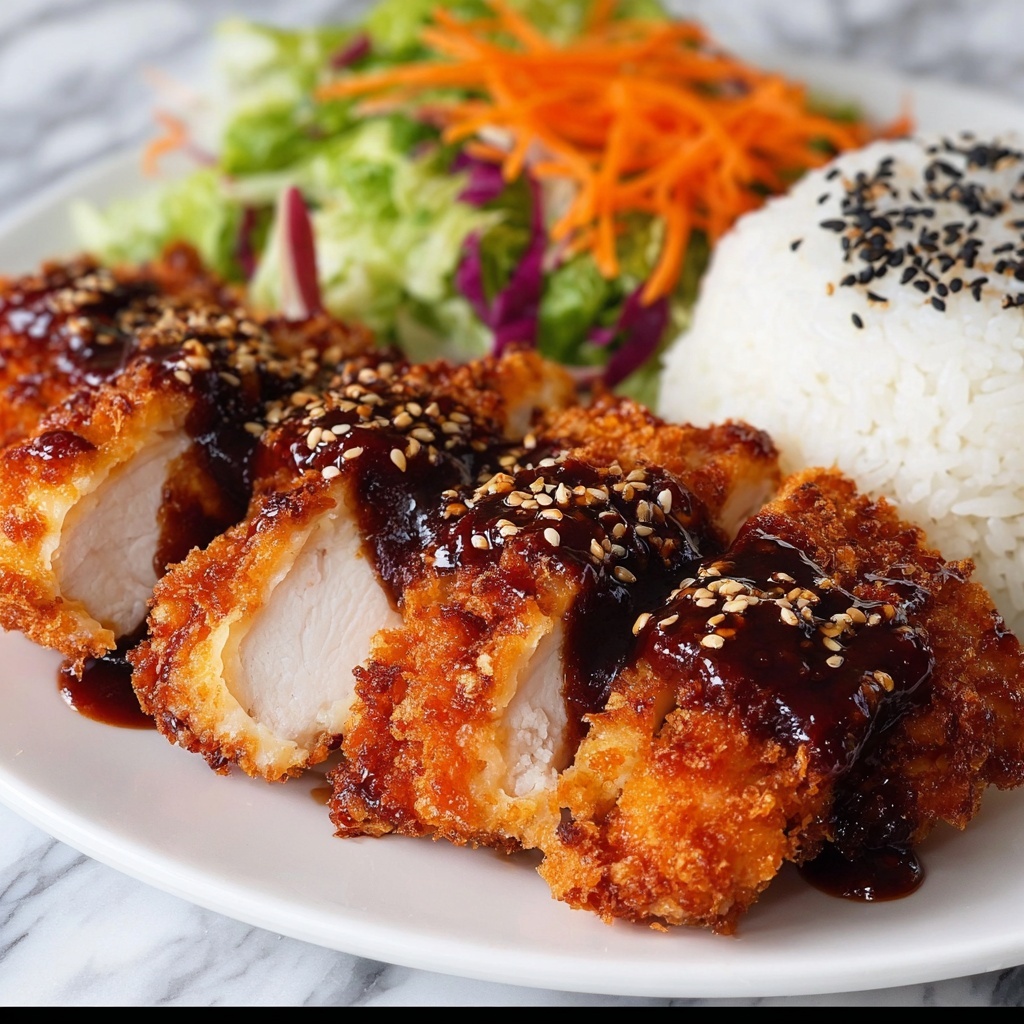
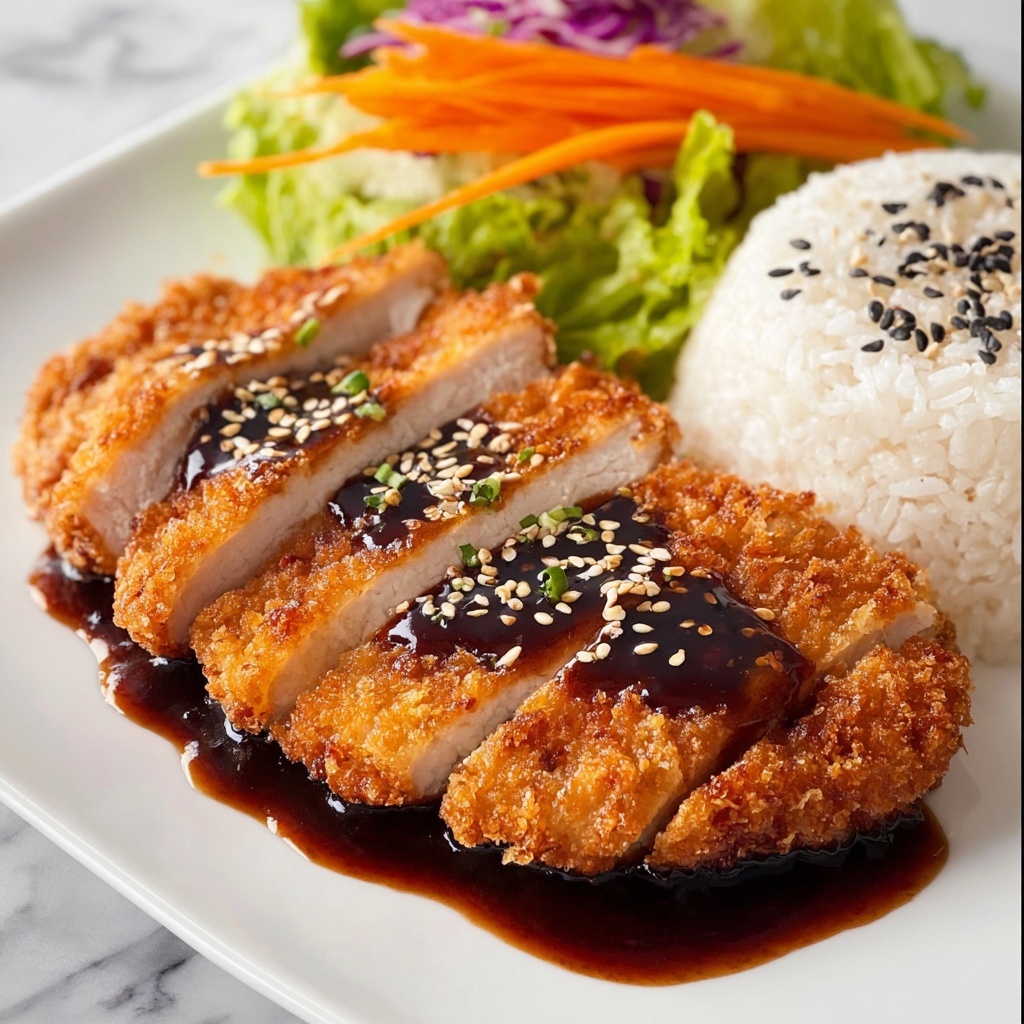
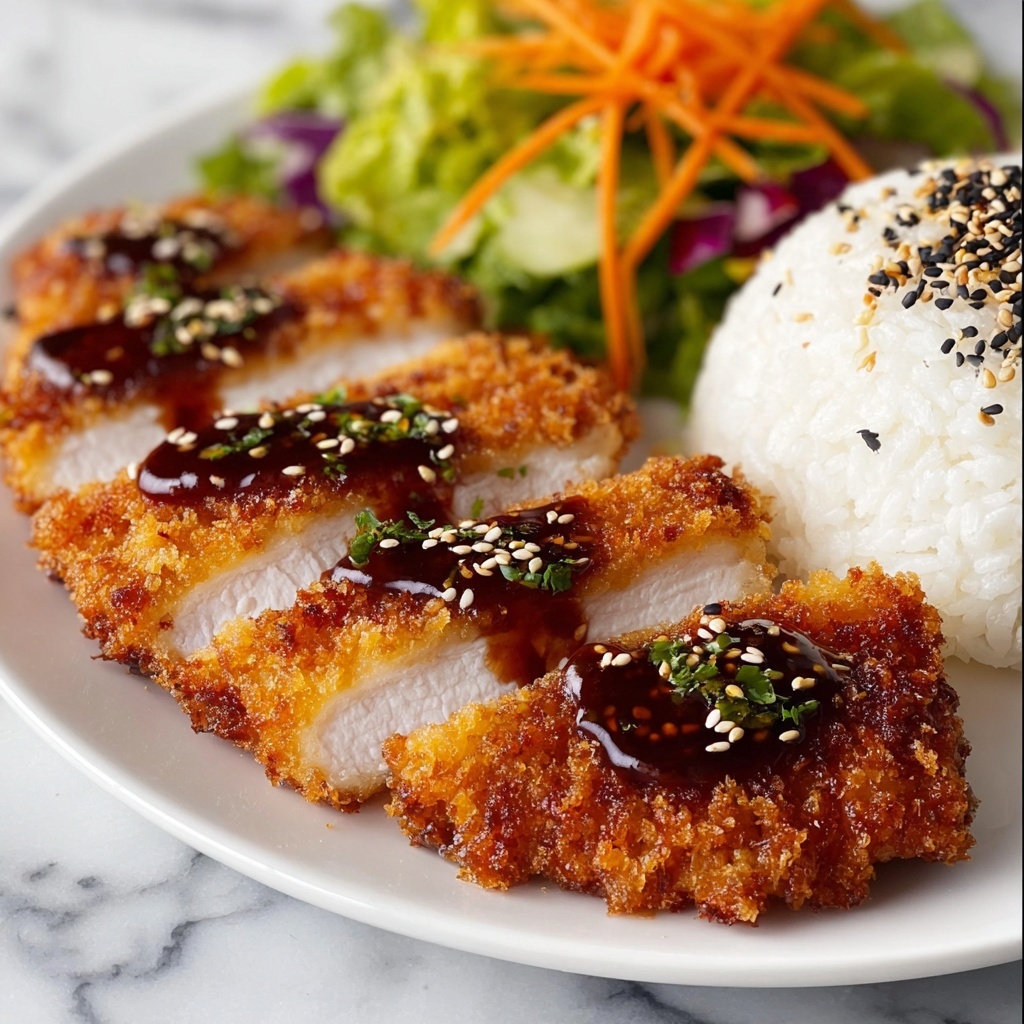
Plate your crispy chicken katsu while it’s still hot and pile on a generous spoonful of your homemade katsu sauce. The contrast between the crunchy exterior and tangy sauce is what makes this dish so addictive. Trust me, you’ll want seconds!
How to Serve Chicken Katsu with Homemade Katsu Sauce Recipe
Garnishes
Fresh garnishes elevate this dish wonderfully. Try thinly sliced green onions or a sprinkle of toasted sesame seeds for a subtle crunch and hint of nuttiness. Pickled ginger or a few wedges of lemon add brightness and balance the richness of the fried chicken.
Side Dishes
Traditional Japanese sides like steamed white rice or sticky sushi rice make a perfect match, soaking up the katsu sauce beautifully. For a burst of freshness, serve alongside a crisp cabbage slaw tossed in a light sesame dressing. Miso soup or clear broth soup rounds out the meal with warmth and comfort.
Creative Ways to Present
If you want to change things up, slice the chicken katsu thinly and serve it as a donburi bowl over rice with drizzled sauce and chopped scallions. You can also tuck it inside a sandwich or burger bun with crisp lettuce and mayo for a fun fusion twist that’s perfect for lunch or picnic fare.
Make Ahead and Storage
Storing Leftovers
Leftover chicken katsu tastes fantastic the next day if stored properly. Place cooled pieces in an airtight container and refrigerate for up to 2 days. Keep the katsu sauce separate to avoid sogginess and reheat chicken to maintain that crunchy texture.
Freezing
You can freeze cooked chicken katsu by wrapping each piece tightly in plastic wrap and placing them in a freezer-safe container or bag. They will keep well for up to 1 month. Freeze the katsu sauce in a separate container and thaw both in the refrigerator before reheating.
Reheating
To bring back the crispiness, reheat chicken katsu in a conventional oven or air fryer at 350°F for about 10 minutes rather than microwaving. Microwave reheating tends to soften the breading, which you want to avoid for that perfect crunch. Warm the sauce gently on the stove or in the microwave separately.
FAQs
Can I use chicken thighs instead of breasts for this Chicken Katsu with Homemade Katsu Sauce Recipe?
Absolutely! Chicken thighs add extra juiciness and flavor, but be sure to use boneless, skinless thighs and adjust frying time slightly to ensure they cook through properly.
What kind of oil is best for frying chicken katsu?
Vegetable oil is ideal because of its neutral flavor and high smoke point, which helps the chicken crisp up without burning. You could also use canola or peanut oil with great results.
Can I make the katsu sauce without oyster sauce?
If you don’t have oyster sauce, you can substitute it with soy sauce or a mix of soy sauce and a little fish sauce. It won’t be exactly the same but will still add a nice depth of umami.
Is it possible to bake chicken katsu instead of frying?
Yes, for a lighter version, bake the breaded chicken on a wire rack at 425°F for about 20 minutes, flipping halfway. It won’t be as crispy as fried but still delicious.
How do I know when the chicken is fully cooked?
The safest way is to use a meat thermometer and check that the internal temperature reaches 165°F. Alternatively, cut into the thickest part to ensure the meat is white and juices run clear.
Final Thoughts
This Chicken Katsu with Homemade Katsu Sauce Recipe is one of those dishes that feels like a warm hug on a plate—crispy, flavorful, and downright satisfying. Whether you’re cooking for yourself or a loved one, I encourage you to give this recipe a try. The homemade sauce adds a special touch that will have everyone asking for seconds. Get ready to bring a little delicious Japan into your kitchen with ease and joy!
Print
Chicken Katsu with Homemade Katsu Sauce Recipe
- Prep Time: 10 minutes
- Cook Time: 25 minutes
- Total Time: 35 minutes
- Yield: 2 servings
- Category: Main Course
- Method: Frying
- Cuisine: Japanese
Description
This Chicken Katsu recipe features crispy, golden-fried chicken breasts coated with a flavorful panko crust and served with a tangy, sweet-savory katsu sauce. Perfectly breaded and fried, this Japanese-inspired dish is quick to prepare and ideal for a satisfying meal.
Ingredients
Chicken and Breading
- 1 pound boneless, skinless chicken breasts
- ¼ cup all-purpose flour
- 2 tablespoons cornstarch
- 1 large egg
- 1 tablespoon water
- ¾ cup panko breadcrumbs
- 2 teaspoons garlic salt
- 1 teaspoon black pepper
- 1 ½ teaspoons ground ginger
- Vegetable oil, for frying
Katsu Sauce
- ¼ cup ketchup
- 3 tablespoons Worcestershire sauce
- 1 tablespoon brown sugar
- 2 tablespoons oyster sauce
- 1 teaspoon garlic salt
Instructions
- Prepare Chicken: Trim the chicken breasts to an even thickness for uniform cooking and pat them dry with paper towels to ensure the breading sticks properly.
- Make Katsu sauce: In a small bowl, whisk together ketchup, Worcestershire sauce, brown sugar, oyster sauce, and garlic salt until smooth. Set aside to serve later.
- Bread Chicken: Arrange three separate trays or shallow dishes: one with the flour and cornstarch mixture, one with beaten egg mixed with water, and one with panko breadcrumbs combined with garlic salt, black pepper, and ground ginger. Dredge each chicken breast first in the flour mixture, then dip into the egg wash, and finally coat thoroughly with the panko breadcrumb mixture.
- Fry Chicken: Heat vegetable oil in a skillet or pot to 350°F (175°C). Carefully add the breaded chicken breasts and fry for approximately 4 minutes on each side, or until the coating is golden brown and the internal temperature reaches 165°F (74°C). Remove and drain on paper towels or a wire rack to remove excess oil.
- Serve: Plate the crispy chicken katsu hot along with the prepared katsu sauce for dipping or drizzling. Enjoy immediately for best texture and flavor.
Notes
- Ensure chicken breasts are evenly pounded if needed to achieve uniform thickness and cooking.
- Maintain oil temperature at 350°F for perfect frying; too low will cause greasiness, too high may burn the coating.
- Use a thermometer to check chicken’s internal temperature for safe consumption.
- Katsu sauce can be made ahead and refrigerated for up to 3 days.
- Serve with steamed rice and shredded cabbage for a complete meal.

