
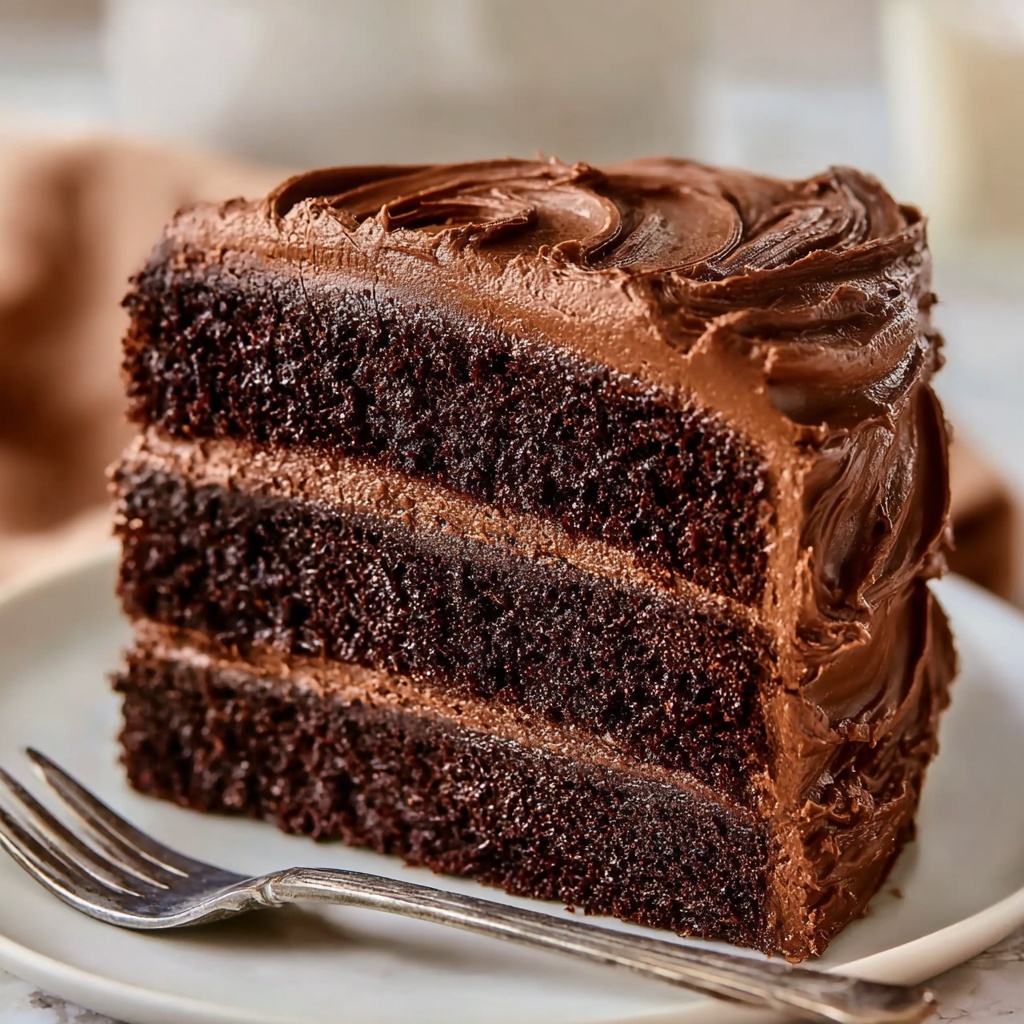
If you’ve ever dreamed of biting into a moist, tender, and deeply chocolatey dessert that feels like a warm hug, then this Homemade Chocolate Cake with Rich Chocolate Frosting Recipe is your new best friend. It combines simple pantry staples into a show-stopping cake that boasts a perfect crumb and a luscious frosting that’s velvety smooth and indulgently chocolatey. Whether you’re celebrating a special occasion or just craving a bit of comfort, this recipe promises satisfaction in every bite.
Ingredients You’ll Need
The magic of this cake lies in its straightforward but essential ingredients. Each one works together to create the perfect texture, height, and deep chocolate flavor that makes this cake irresistible.
- All-purpose flour: The base of the cake that provides structure and a light crumb.
- Granulated sugar: Sweetens the batter and helps create a tender texture.
- Baking powder and baking soda: These leavening agents lift the cake to light, fluffy perfection.
- Salt: Enhances and balances the rich chocolate flavors.
- Unsweetened cocoa powder: Delivers that intense chocolate taste and beautiful dark color.
- Milk (room temperature): Moisturizes the cake to keep it soft and tender.
- Vegetable oil: Adds moisture and keeps the cake delightfully soft.
- Large eggs: Bind the ingredients and contribute to the cake’s structure.
- Vanilla extract: Lifts the chocolate flavor and adds warmth.
- Boiling water: Helps bloom the cocoa, making the chocolate flavor richer and the batter surprisingly smooth.
- Unsalted butter (softened): The creamy base for the frosting, lending richness and silkiness.
- Powdered sugar (sifted): Sweetens and thickens the frosting for that perfect spreadable consistency.
- Additional milk: Adjusts frosting thickness for easy spreading without losing fluffiness.
- Pinch of salt: Balances sweetness in the frosting and intensifies chocolate depth.
How to Make Homemade Chocolate Cake with Rich Chocolate Frosting Recipe
Step 1: Preheat and Prep
Start by heating your oven to 350°F (175°C). Prepare two 9-inch cake pans by greasing them well and lining the bottoms with parchment paper. This ensures your cake layers come out cleanly and maintain their beautiful shape.
Step 2: Combine the Dry Ingredients
In a large mixing bowl, whisk together the flour, granulated sugar, baking powder, baking soda, salt, and cocoa powder. This uniform blend guarantees that every bite of your Homemade Chocolate Cake with Rich Chocolate Frosting Recipe has a consistent chocolatey goodness with perfect rise and crumb.
Step 3: Add the Wet Ingredients
Pour in the milk, vegetable oil, eggs, and vanilla extract to the dry mixture. Stir gently just until everything is combined — overmixing can make the cake dense, but you want to keep it light and tender.
Step 4: Incorporate the Boiling Water
This is the secret to a super moist and intense cake. Slowly stir in the boiling water and mix until smooth. Don’t worry if the batter seems runny — that’s exactly how it should be for a cake this luscious.
Step 5: Bake Your Cake
Divide the batter evenly between the two prepared pans, smoothing the surface gently. Bake for about 30 to 35 minutes. You’ll know it’s done when a toothpick comes out clean from the center. The smell alone will have you drooling already.
Step 6: Cool Down
Allow the cakes to cool in their pans for 10 minutes — this helps them firm up enough to handle — then turn them onto wire racks to cool completely. Frosting warm cake would make a mess, so patience here is golden.
Step 7: Prepare the Rich Chocolate Frosting
In a small saucepan or microwave-safe bowl, melt the unsalted butter until smooth. Whisk in the cocoa powder to create a silky chocolate base for your frosting. This step intensifies the chocolate flavor and adds delightful creaminess.
Step 8: Finish the Frosting Mix
In a large bowl, combine the sifted powdered sugar, milk, vanilla extract, and a pinch of salt with your melted chocolate butter mixture. Beat everything until the frosting is smooth and fluffy. If it’s too thick, add a splash more milk to get that perfect spreadable texture.
Step 9: Frost the First Layer
Place one cooled cake layer on your favorite serving plate. Spread a generous, even layer of the rich chocolate frosting over it. Taking your time here ensures every bite will have a luscious frosting-to-cake balance.
Step 10: Stack and Finish Frosting
Gently place the second cake layer on top and coat the entire cake — top and sides — with the remaining frosting. The smooth, glossy finish is worth savoring even before the first forkful.
Step 11: Let It Set
Allow your frosted masterpiece to rest so the frosting can set slightly. This makes slicing easier and keeps each piece looking perfect for serving.
How to Serve Homemade Chocolate Cake with Rich Chocolate Frosting Recipe
Garnishes
While the cake stands strong on its own, adding fresh raspberries, a light dusting of cocoa powder, or some finely chopped toasted nuts on top can elevate each piece with contrasting textures and flavors that complement the chocolate richness.
Side Dishes
Pair this decadent chocolate cake with a scoop of vanilla ice cream, a dollop of whipped cream, or a small bowl of fresh berries for a delightful balance. A cup of strong coffee or dark roast tea also makes an excellent companion, highlighting the deep chocolate notes.
Creative Ways to Present
For special occasions, consider layering the cake with fresh fruit between the layers or adding edible gold leaf accents for an elegant touch. Serving the cake on a decorative cake stand or alongside colorful dessert plates can make your Homemade Chocolate Cake with Rich Chocolate Frosting Recipe the centerpiece of any gathering.
Make Ahead and Storage
Storing Leftovers
Keep any leftover cake covered tightly in the refrigerator to maintain moisture and prevent the frosting from drying out. Properly stored, it will stay delicious for up to four days, making it perfect for enjoying over several sittings.
Freezing
You can freeze this cake either as whole layers or as a fully frosted cake. Wrap tightly in plastic wrap and then foil to avoid freezer burn. When stored correctly, the cake can last up to three months. Thaw slowly in the fridge before serving for the best texture and flavor.
Reheating
Since this cake is best served at room temperature, simply remove slices from the fridge about 30 minutes before eating. If you prefer a warm slice, gently warm it in the microwave for 10-15 seconds, but be careful not to melt the frosting too much.
FAQs
Can I substitute ingredients in the Homemade Chocolate Cake with Rich Chocolate Frosting Recipe?
Absolutely! For example, you can use buttermilk instead of milk for a tangier flavor, or coconut oil instead of vegetable oil for a slight tropical note. Just keep in mind that swaps might subtly change the texture or flavor.
Is this recipe suitable for beginners?
Definitely! This Homemade Chocolate Cake with Rich Chocolate Frosting Recipe is straightforward and forgiving. With clear steps and common ingredients, even novice bakers can impress with a delicious result.
How do I ensure the frosting is smooth and not grainy?
Make sure to sift the powdered sugar before mixing and beat the frosting long enough to develop fluffiness. Also, fading the butter completely and whisking in the cocoa powder helps achieve that perfect smooth consistency.
Can I make this cake gluten-free?
Yes! Replace the all-purpose flour with a one-to-one gluten-free baking flour blend. Just make sure it contains xanthan gum or another binder to keep the cake’s structure intact.
What’s the best way to prevent the cake from drying out?
Use room temperature ingredients, avoid overbaking, and store the cake covered properly. The vegetable oil also helps keep this cake moist and tender over time.
Final Thoughts
There’s something truly special about baking and sharing a cake made from scratch, especially when it is a Homemade Chocolate Cake with Rich Chocolate Frosting Recipe that marries moist, tender cake with decadent frosting. It’s a timeless treat that brings joy to both the baker and those lucky enough to taste it. So go ahead, preheat your oven, gather those simple ingredients, and enjoy every delicious moment of this chocolate celebration.
Print
Homemade Chocolate Cake with Rich Chocolate Frosting Recipe
- Prep Time: 15 minutes
- Cook Time: 35 minutes
- Total Time: 55 minutes
- Yield: 12 servings
- Category: Dessert
- Method: Baking
- Cuisine: American
Description
A rich and moist homemade chocolate cake layered with creamy chocolate frosting, perfect for celebrations or any chocolate lover’s craving. This recipe combines cocoa powder with warm boiling water to ensure a tender crumb and deep chocolate flavor, finished with a smooth, fluffy frosting made from butter and cocoa.
Ingredients
For the Cake:
- 2 cups all-purpose flour
- 2 cups granulated sugar
- 1 1/2 tsp baking powder
- 1 1/2 tsp baking soda
- 1/2 tsp salt
- 3/4 cup unsweetened cocoa powder
- 1 cup milk (room temperature)
- 1/2 cup vegetable oil
- 2 large eggs
- 2 tsp vanilla extract
- 1 cup boiling water
For the Chocolate Frosting:
- 1 cup unsalted butter (softened)
- 3/4 cup unsweetened cocoa powder
- 4 cups powdered sugar (sifted)
- 1/2 cup milk
- 2 tsp vanilla extract
- Pinch of salt
Instructions
- Preheat the Oven: Set your oven to 350°F (175°C). Grease two 9-inch cake pans and line them with parchment paper to prevent sticking.
- Mix Dry Ingredients: In a large mixing bowl, whisk together the flour, sugar, baking powder, baking soda, salt, and cocoa powder until evenly combined.
- Mix Wet Ingredients: Add the milk, vegetable oil, eggs, and vanilla extract to the dry ingredients. Mix until just combined to avoid overmixing, which can toughen the cake.
- Add Boiling Water: Slowly pour in the boiling water while stirring continuously. This will thin the batter but ensures a moist, smooth texture.
- Bake: Divide the batter evenly between the prepared cake pans. Bake in the preheated oven for 30-35 minutes, or until a toothpick inserted into the center comes out clean.
- Cool the Cakes: Allow the cakes to cool in their pans for 10 minutes. Then, carefully transfer them to a wire rack to cool completely to room temperature before frosting.
- Melt the Butter: In a saucepan or microwave-safe bowl, melt the unsalted butter. Whisk in the cocoa powder until the mixture is smooth and well combined.
- Mix Ingredients: In a large bowl, combine the powdered sugar, milk, vanilla extract, and a pinch of salt with the melted butter and cocoa mixture. Beat the frosting until it is smooth and fluffy. Adjust the milk quantity to achieve your desired consistency.
- Frost the Layers: Place one cooled cake layer on your serving plate. Spread a generous, even layer of chocolate frosting over the top.
- Stack and Frost: Carefully place the second cake layer on top of the first. Spread the remaining frosting evenly over the top and sides of the cake for a smooth finish.
- Set Before Serving: Allow the frosting to set at room temperature for a bit to firm up before slicing and serving to achieve clean cuts and best texture.
Notes
- Boiling water thins the batter but is key for a moist cake; batter will be runny—that’s normal.
- Use room temperature ingredients for better mixing and cake texture.
- Ensure cakes are completely cool before frosting to prevent melting the frosting.
- If frosting is too thick, add more milk one tablespoon at a time to reach desired consistency.
- Store leftover cake covered at room temperature for up to 2 days or in the refrigerator for up to 5 days.


