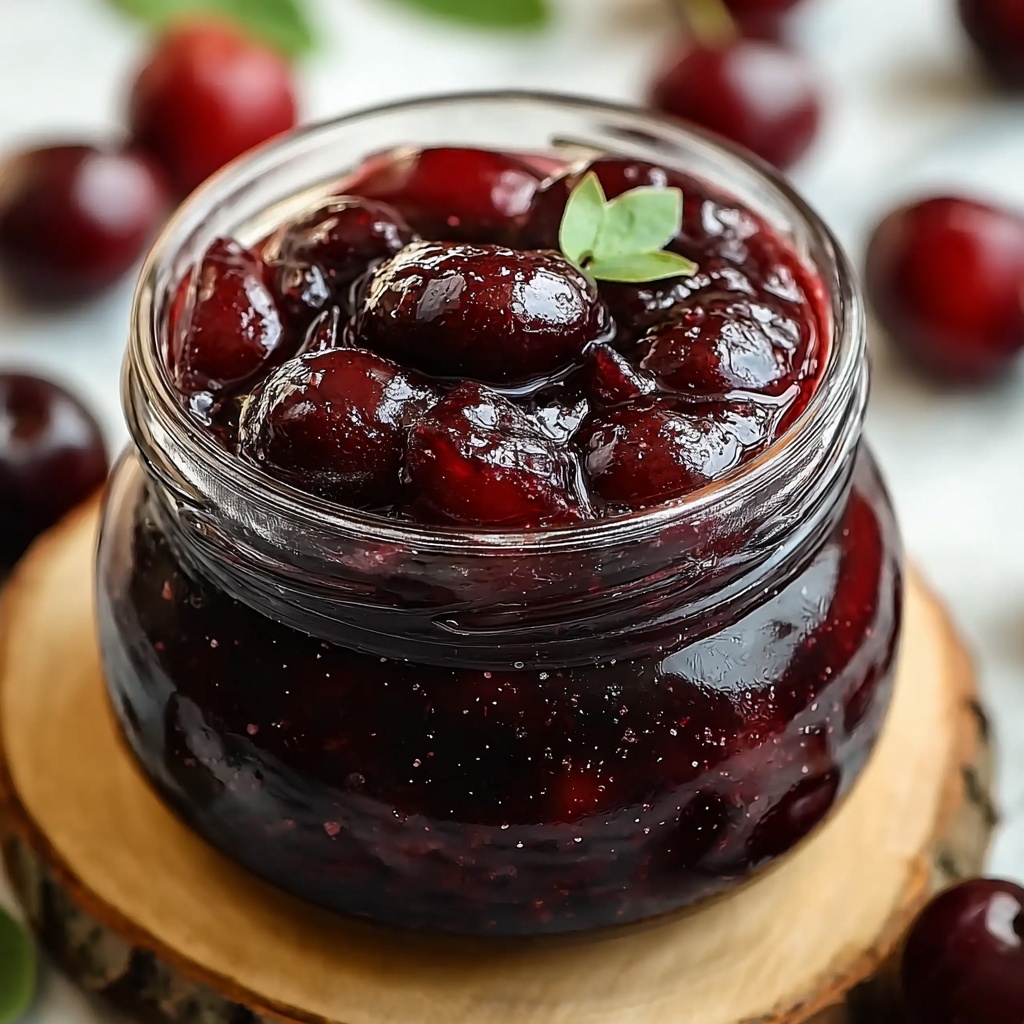
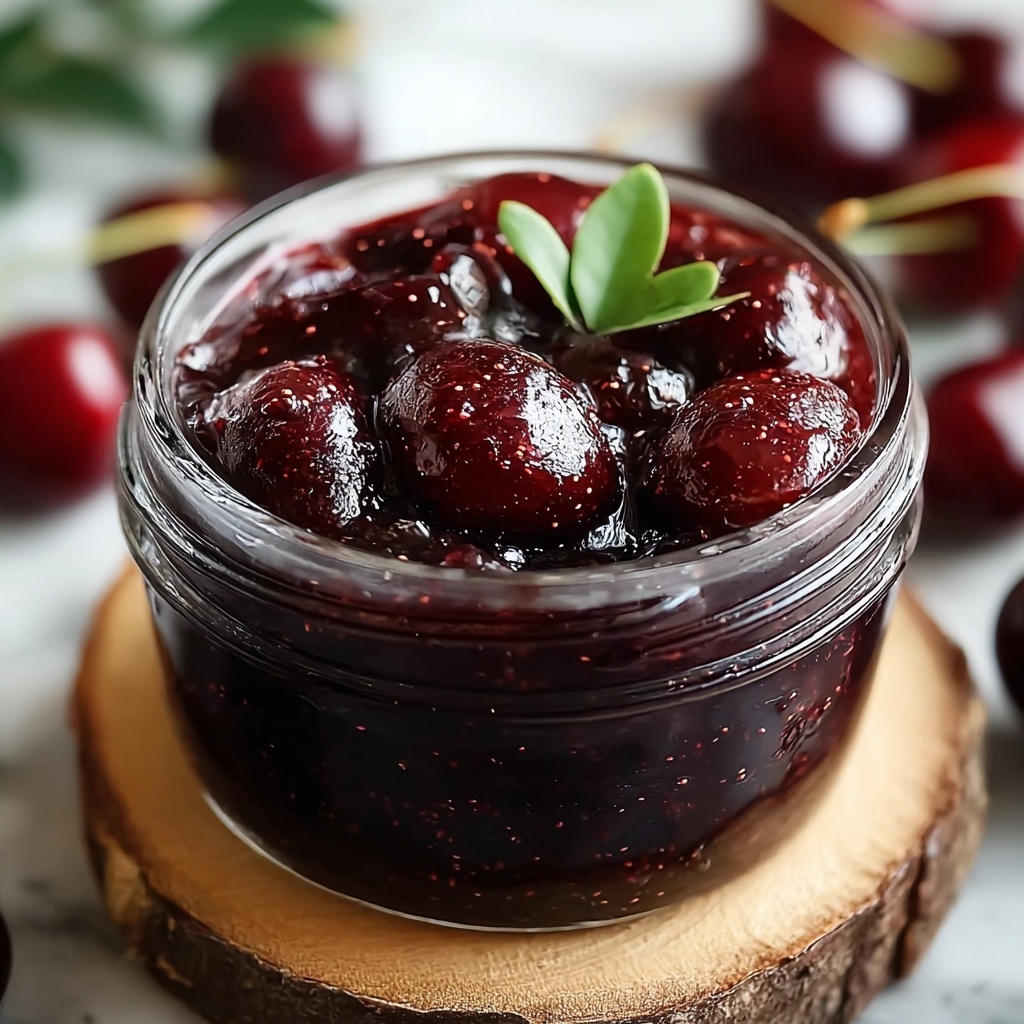
If you have a bounty of ripe plums or simply crave a delightful preserve that bursts with flavor, this Sweet and Tangy Homemade Plum Jam Recipe is about to become your new favorite. Imagine capturing the vibrant, juicy sweetness of plums, perfectly balanced with a hint of tang from fresh lemon juice and a whisper of warm cinnamon. This jam is a gorgeous blend of natural fruitiness and just the right amount of tartness, creating a spread that’s as delicious on morning toast as it is dolloped onto cheese boards or swirled into yogurt. Trust me, once you make this, store-bought jam will feel so last season.

Ingredients You’ll Need
This recipe calls for simple and straightforward ingredients that you likely have or can easily find, and each plays a vital role in crafting that beautiful color, texture, and flavor complexity in your jam.
- 2 pounds ripe plums, pitted and chopped: The star of the show, ripe plums provide natural sweetness and a lovely deep hue.
- 3 cups granulated sugar: Essential for sweetness and helps the jam set properly while preserving.
- 1/4 cup fresh lemon juice: Adds brightness and acidity to balance the sweetness and aids in the gelling process.
- 1/4 teaspoon ground cinnamon (optional): A subtle warming spice that adds depth without overpowering the plums’ flavor.
- 1 tablespoon pectin (optional): If you’re looking for a quicker set, this natural thickener ensures your jam firms up beautifully.
How to Make Sweet and Tangy Homemade Plum Jam Recipe
Step 1: Prepare the Plums
Start by washing your plums thoroughly, then remove the pits and chop them into small chunks. This helps the plums cook evenly and release their juices quickly, forming the base of an irresistible jam.
Step 2: Combine Ingredients in a Pot
Place your chopped plums, sugar, lemon juice, and cinnamon into a large, heavy-bottomed pot. Stir everything together gently so the sugar starts dissolving into the fruit juices. Letting this mixture sit for about 15 minutes can help the sugar draw out more of the plum’s natural liquid.
Step 3: Cook the Mixture
Put the pot over medium heat and bring the mixture to a gentle boil, stirring regularly to prevent sticking. If using pectin, sprinkle it in now and continue to stir briskly. You’ll notice the fruit softening and the mixture thickening as it reaches a rolling boil. This process usually takes 20 to 30 minutes depending on your stove and pot size.
Step 4: Test for Set
To check if your jam is ready, place a small spoonful on a chilled plate. Let it sit for a minute, then tilt the plate. If the jam wrinkles and holds its shape without running, it’s done. If not, keep boiling and testing every few minutes.
Step 5: Jar Your Jam
Once set, remove the pot from the heat and carefully ladle the hot jam into sterilized jars. Leave a bit of headspace, wipe the jar rims clean, and seal them tightly. Let the jars cool to room temperature before storing.
How to Serve Sweet and Tangy Homemade Plum Jam Recipe
Garnishes
Enhance your presentation by garnishing your jam with a sprig of fresh mint or a light dusting of cinnamon. These small touches highlight the warmth and freshness of the jam, making it even more inviting on the table.
Side Dishes
This plum jam pairs superbly with warm buttered toast, flaky croissants, or creamy ricotta cheese. It’s also a fantastic companion to savory meats like roasted pork or charcuterie platters, offering a sweet contrast that elevates every bite.
Creative Ways to Present
Instead of just spreading it on bread, swirl this jam into oatmeal, layer it in parfaits with yogurt and granola, or use it as a glaze on grilled meats. Its versatility shines through when you experiment beyond the usual.
Make Ahead and Storage
Storing Leftovers
If you find yourself with extra jars of this Sweet and Tangy Homemade Plum Jam Recipe, store them in the refrigerator once opened. This will keep your jam fresh and flavorful for up to three weeks.
Freezing
You can also freeze your plum jam if you want to keep it longer. Just transfer the jam into freezer-safe containers, leaving some space for expansion, and freeze for up to six months. Thaw overnight in the fridge before use.
Reheating
When you’re ready to enjoy your jam from the fridge or freezer, just warm it gently in a saucepan over low heat while stirring until it reaches your desired consistency. This revives that fresh-from-the-pot texture and aroma.
FAQs
Can I use other types of plums for this recipe?
Absolutely! This Sweet and Tangy Homemade Plum Jam Recipe works beautifully with most plum varieties. Just pick ripe, juicy plums for the best sweetness and jam consistency.
Is it necessary to use pectin for the jam to set?
Pectin is optional but helpful if you want a quicker set. Plums naturally have some pectin, so cooking the jam longer will also help it thicken without added pectin.
How long does homemade plum jam last?
If sealed properly in sterilized jars and stored in a cool, dark place, your jam can last up to one year. Once opened, keep it refrigerated and use within three weeks.
Can I reduce the sugar content in this jam?
Reducing sugar is possible but may affect the jam’s texture and shelf life since sugar acts as a preservative. Consider using an alternative like honey or eating the jam soon after making it if you cut back on sugar.
What if my jam didn’t set properly?
If your jam seems too runny, you can return it to the stove and boil it a bit longer, or add a small amount of pectin to help it thicken. Remember, jam firms up more as it cools, so give it some time before deciding.
Final Thoughts
There is something truly rewarding about making your own preserves, and this Sweet and Tangy Homemade Plum Jam Recipe nails the perfect balance of flavors and textures you want in a good jam. It’s a joy to make, incredibly versatile, and a guaranteed crowd-pleaser. So grab those luscious plums and get cooking – your taste buds will thank you!
Print
Sweet and Tangy Homemade Plum Jam Recipe
- Prep Time: 15 minutes
- Cook Time: 50 minutes
- Total Time: 1 hour 5 minutes
- Yield: 3 cups of plum jam
- Category: Condiment
- Method: Stovetop
- Cuisine: American
Description
This homemade plum jam recipe transforms ripe plums into a sweet and tangy spread perfect for toast, pastries, or as a flavorful addition to desserts. Made with simple ingredients like fresh plums, sugar, and a hint of lemon juice, this jam offers a delightful balance of fruitiness and sweetness. Optional cinnamon and pectin enhance the flavor and texture for a perfect set and aromatic touch.
Ingredients
Main Ingredients
- 2 pounds ripe plums, pitted and chopped
- 3 cups granulated sugar
- 1/4 cup fresh lemon juice
Optional Ingredients
- 1/4 teaspoon ground cinnamon (optional)
- 1 tablespoon pectin (optional, for quicker setting)
Instructions
- Prepare the Fruit: Thoroughly wash, pit, and chop the plums into small pieces to ensure even cooking and smooth jam consistency.
- Combine Ingredients: In a large pot, combine the chopped plums, granulated sugar, fresh lemon juice, and if using, ground cinnamon and pectin. Stir well to evenly distribute all components.
- Cook the Jam: Place the pot over medium heat and bring the mixture to a boil, stirring frequently to prevent sticking and burning. Once boiling, reduce the heat to medium-low and simmer, stirring often, for about 45 minutes to 1 hour, or until the jam thickens and reaches the desired consistency.
- Test the Jam Set: To check if the jam is ready, place a small spoonful on a chilled plate and let it cool for a minute. If it wrinkles when pushed with a finger, the jam is set. If not, continue cooking a few more minutes and test again.
- Jar the Jam: Carefully ladle the hot jam into sterilized jars, leaving about 1/4 inch headspace. Wipe jar rims clean and seal tightly with lids.
- Cool and Store: Allow jars to cool completely at room temperature. Store in the refrigerator for immediate use or process in a water bath for long-term pantry storage.
Notes
- If you prefer a smoother jam, you can blend the cooked mixture slightly before jarring.
- Pectin is optional but helps the jam set faster and with a firmer texture.
- Using fresh lemon juice adds natural acidity to balance the sweetness and helps with preservation.
- Store opened jam in the refrigerator and consume within 3 weeks.


