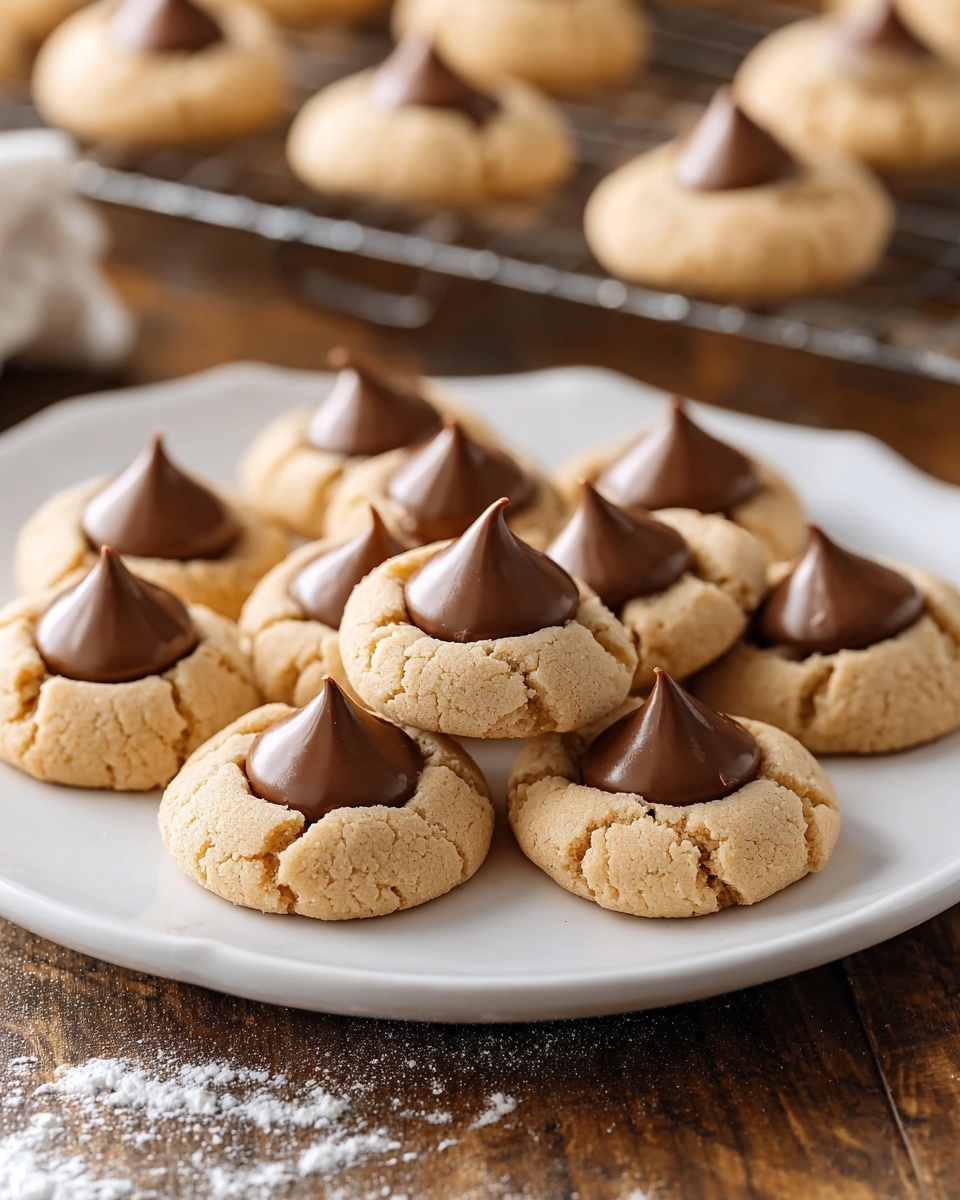
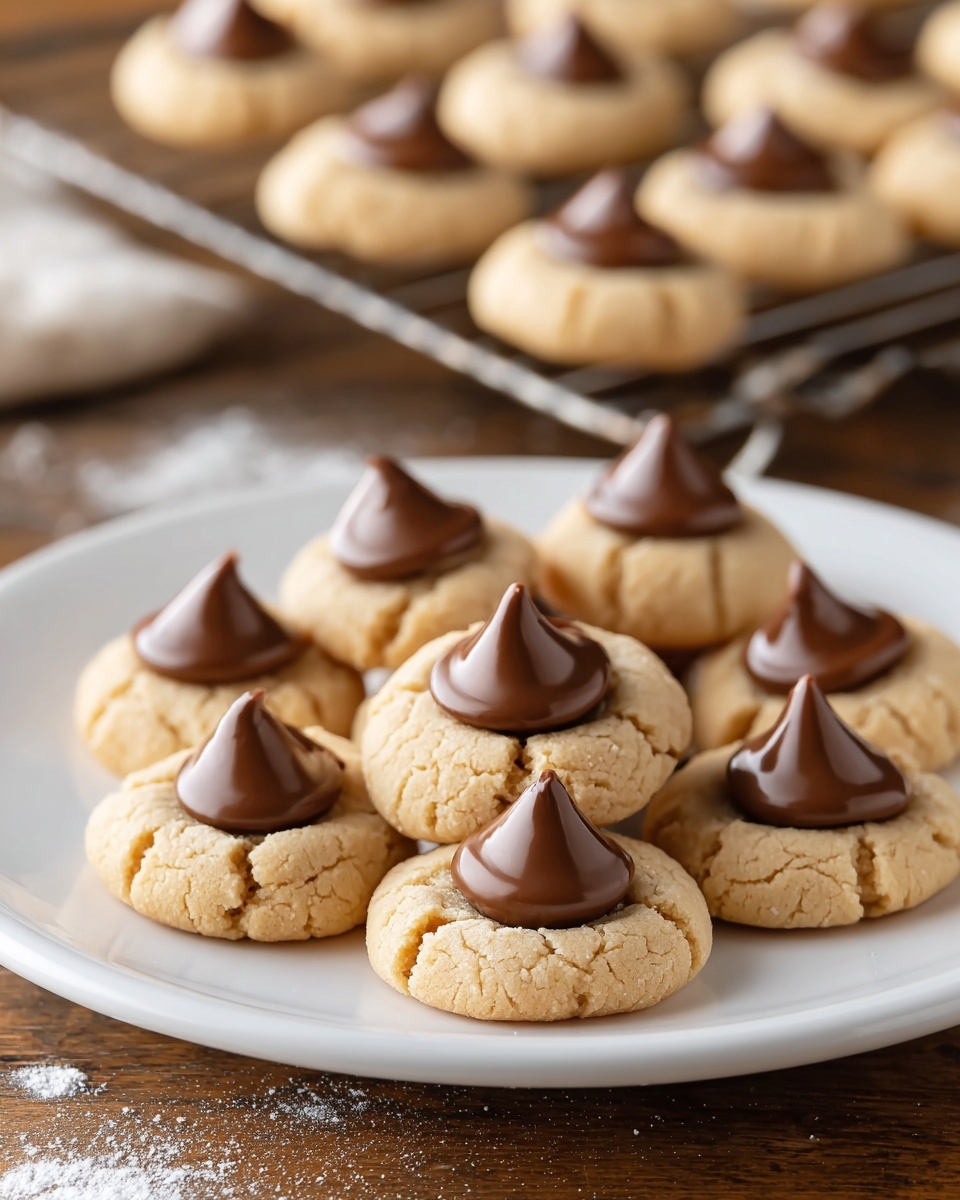
If you are craving a nostalgic treat that perfectly blends sweet and nutty flavors, this Homemade Peanut Butter Kiss Cookies Recipe is exactly what you need. These soft, chewy cookies crowned with a classic chocolate kiss in the center bring a warm, comforting vibe with every bite. The simplicity of peanut butter paired with the rich, melty chocolate creates a beautiful balance that’s both satisfying and irresistible. Whether you’re baking for a holiday, a family gathering, or just because, these cookies never fail to bring smiles and happy memories to the table.
Ingredients You’ll Need
These ingredients are wonderfully simple yet essential to crafting the perfect texture and flavor of your Homemade Peanut Butter Kiss Cookies Recipe. Each component plays a key role: the creamy butter and peanut butter offer richness, sugars add that perfect mellow sweetness and slight chewiness, and the flour blend ensures a tender crumb that holds the iconic chocolate kiss beautifully.
- 1/2 cup unsalted butter, softened: Helps create a soft, rich base for tender cookies.
- 1/2 cup peanut butter: Adds that irresistible nutty flavor and moist texture.
- 1/2 cup granulated sugar: Balances sweetness and contributes to a slight crisp edge.
- 1/2 cup brown sugar: Brings moisture and a subtle caramel depth to the cookies.
- 1 large egg: Binds ingredients and adds structure without weighing down the cookies.
- 1 tsp vanilla extract: Enhances overall flavor with a warm, sweet note.
- 1 3/4 cups all-purpose flour: The foundation that gives the cookies their perfect chewiness.
- 1 tsp baking soda: Helps the cookies rise just enough without spreading too thin.
- 1/4 tsp salt: Balances sweetness and elevates the peanut butter flavor.
- 24 chocolate kisses: The iconic finishing touch that melts into the center while the cookies cool.
How to Make Homemade Peanut Butter Kiss Cookies Recipe
Step 1: Preheat and Prepare
Start by setting your oven to 350°F (175°C). Prepare a baking sheet by lining it with parchment paper or a non-stick mat to ensure your cookies don’t stick and bake evenly.
Step 2: Cream the Butters and Sugars
In a large bowl, beat together the softened butter, creamy peanut butter, granulated sugar, and brown sugar until the mixture looks light and fluffy. This step is crucial because it incorporates air that helps give your cookies a tender texture and lovely lift.
Step 3: Add Egg and Vanilla
Mix in the egg and vanilla extract until everything is well combined. These ingredients add richness and deepen the cookie’s taste, while the vanilla adds that classic warmth to the flavor profile.
Step 4: Combine Dry Ingredients
In a separate bowl, whisk the all-purpose flour with baking soda and salt. Slowly add this dry mix to your wet ingredients, folding just until blended to avoid overworking the dough, which keeps your cookies soft and chewy.
Step 5: Shape the Dough
Roll the dough into small balls about 1 inch in diameter and place them spaced out on your prepared baking sheet. This size allows the cookies to bake evenly and leave room for spreading without merging.
Step 6: Bake
Bake the cookies for around 10 minutes, or until the edges turn a light golden brown. You want them soft in the middle so they stay delightfully chewy once cooled.
Step 7: Top with Chocolate Kisses
Right after taking the cookies out of the oven, gently press a chocolate kiss into the center of each warm cookie. The chocolate will soften and meld into the cookie top, creating that signature look and taste.
Step 8: Cool and Enjoy
Let the cookies cool on the baking sheet for a few minutes, giving the chocolate time to set without melting off, then transfer them to a wire rack to cool completely. This ensures the perfect texture and shape when you dig in.
How to Serve Homemade Peanut Butter Kiss Cookies Recipe

Garnishes
While these cookies are gorgeous as is, a light dusting of powdered sugar or a sprinkle of flaky sea salt can elevate their look and add exciting flavor contrasts. Even a drizzle of melted peanut butter or chocolate over the top can take the presentation to the next level.
Side Dishes
Pair your Homemade Peanut Butter Kiss Cookies Recipe with a cold glass of milk or a warm cup of coffee or tea for a classic treat duo. For a fun twist, serve alongside fresh fruit or creamy vanilla ice cream to balance the richness.
Creative Ways to Present
For parties or gifting, arrange your cookies in a charming tin or stack them with parchment paper between layers for easy sharing. You can also serve them on a festive platter with decorative picks or wrap them beautifully in cellophane tied with a ribbon for a thoughtful homemade gift.
Make Ahead and Storage
Storing Leftovers
Keep any leftover cookies fresh by storing them in an airtight container at room temperature for up to a week. This helps maintain their soft texture and delicious peanut butter flavor without drying out.
Freezing
If you want to enjoy these cookies later, freeze the baked cookies (without the chocolate kisses) in a single layer on a baking sheet, then transfer them to a freezer-safe container or bag. Freeze for up to 3 months and add the chocolate kisses after thawing.
Reheating
To bring back that fresh-out-of-the-oven warmth, reheat your cookies in a microwave for about 10-15 seconds or warm them briefly in a preheated oven at 300°F (150°C) for 5 minutes. Press a chocolate kiss into the center right after reheating for that classic finish.
FAQs
Can I use crunchy peanut butter instead of creamy?
Yes, you can! Using crunchy peanut butter will add a delightful texture to the cookies, giving you little bursts of peanuts as you bite in. Just be aware it might slightly affect the dough’s consistency.
Can I substitute the chocolate kisses with another chocolate?
Absolutely! While the iconic chocolate kiss is classic, you can experiment with chocolate chips, chunks, or even small squares of your favorite chocolate bar to suit your taste or what you have on hand.
Why do I need both granulated and brown sugar?
The granulated sugar offers sweetness and a slight crispness around the edges, while brown sugar adds moisture and a rich, caramel-like depth that keeps the cookies chewy and flavorful.
How do I prevent my cookies from spreading too much?
Make sure your butter is properly softened but not melted, and chill the dough briefly if your kitchen is very warm. Also, using the right amount of flour ensures the dough holds its shape better during baking.
Can I make these cookies gluten-free?
Yes, you can substitute the all-purpose flour with a gluten-free baking blend that’s a 1:1 replacement. Just be sure to check that all other ingredients are gluten-free as well.
Final Thoughts
There’s nothing quite like the joy of baking and sharing the Homemade Peanut Butter Kiss Cookies Recipe. It’s a simple recipe that brings incredible comfort and nostalgia with every bite. Whether you’re an experienced baker or just starting, these cookies are a delightful way to fill your home with warm aromas and happy moments. Dive in, get your hands messy, and treat yourself and your loved ones to these little bites of bliss.
Print
Homemade Peanut Butter Kiss Cookies Recipe
- Prep Time: 15 minutes
- Cook Time: 10 minutes
- Total Time: 25 minutes
- Yield: 24 cookies
- Category: Dessert
- Method: Baking
- Cuisine: American
Description
These Homemade Peanut Butter Kiss Cookies are soft, chewy, and bursting with rich peanut butter flavor, topped with a melty chocolate kiss for the perfect sweet finish. Quick to prepare and ideal for sharing, they combine classic cookie ingredients with a nostalgic twist that delights both kids and adults alike.
Ingredients
Cookies
- 1/2 cup unsalted butter, softened
- 1/2 cup peanut butter
- 1/2 cup granulated sugar
- 1/2 cup brown sugar
- 1 large egg
- 1 tsp vanilla extract
- 1 3/4 cups all-purpose flour
- 1 tsp baking soda
- 1/4 tsp salt
Topping
- 24 chocolate kisses
Instructions
- Preheat Oven: Preheat your oven to 350°F (175°C) to ensure it’s at the right temperature when your dough is ready for baking.
- Cream the Butters and Sugars: In a large bowl, use a mixer to cream together the softened butter, peanut butter, granulated sugar, and brown sugar until the mixture is light and fluffy, which helps create a tender cookie texture.
- Add Egg and Vanilla: Beat in the egg and vanilla extract until fully combined, adding moisture and flavor to the dough.
- Combine Dry Ingredients: In a separate bowl, whisk together the all-purpose flour, baking soda, and salt. Gradually add this dry mixture into the wet ingredients and stir until just combined to avoid overmixing that can toughen cookies.
- Shape Dough Balls: Roll the dough into small balls roughly 1 inch in diameter and place them on a baking sheet lined with parchment paper or a silicone baking mat, spacing them evenly.
- Bake Cookies: Bake in the preheated oven for about 10 minutes, or until the edges are lightly golden but the centers are still soft.
- Add Chocolate Kisses: Immediately after removing the cookies from the oven and while they are still warm, press one chocolate kiss into the center of each cookie so it softens and melts slightly.
- Cool Completely: Allow the cookies to cool on the baking sheet for a few minutes to set, then transfer them to a wire rack to cool completely before serving or storing.
Notes
- For softer cookies, slightly underbake and let them cool fully on the baking sheet.
- You can substitute natural peanut butter, but expect a denser texture.
- Chilling the dough for 30 minutes before baking can help shape the cookies better and prevent spreading.
- Store cookies in an airtight container at room temperature for up to 5 days.
- To make these gluten-free, substitute the all-purpose flour with a gluten-free flour blend.


