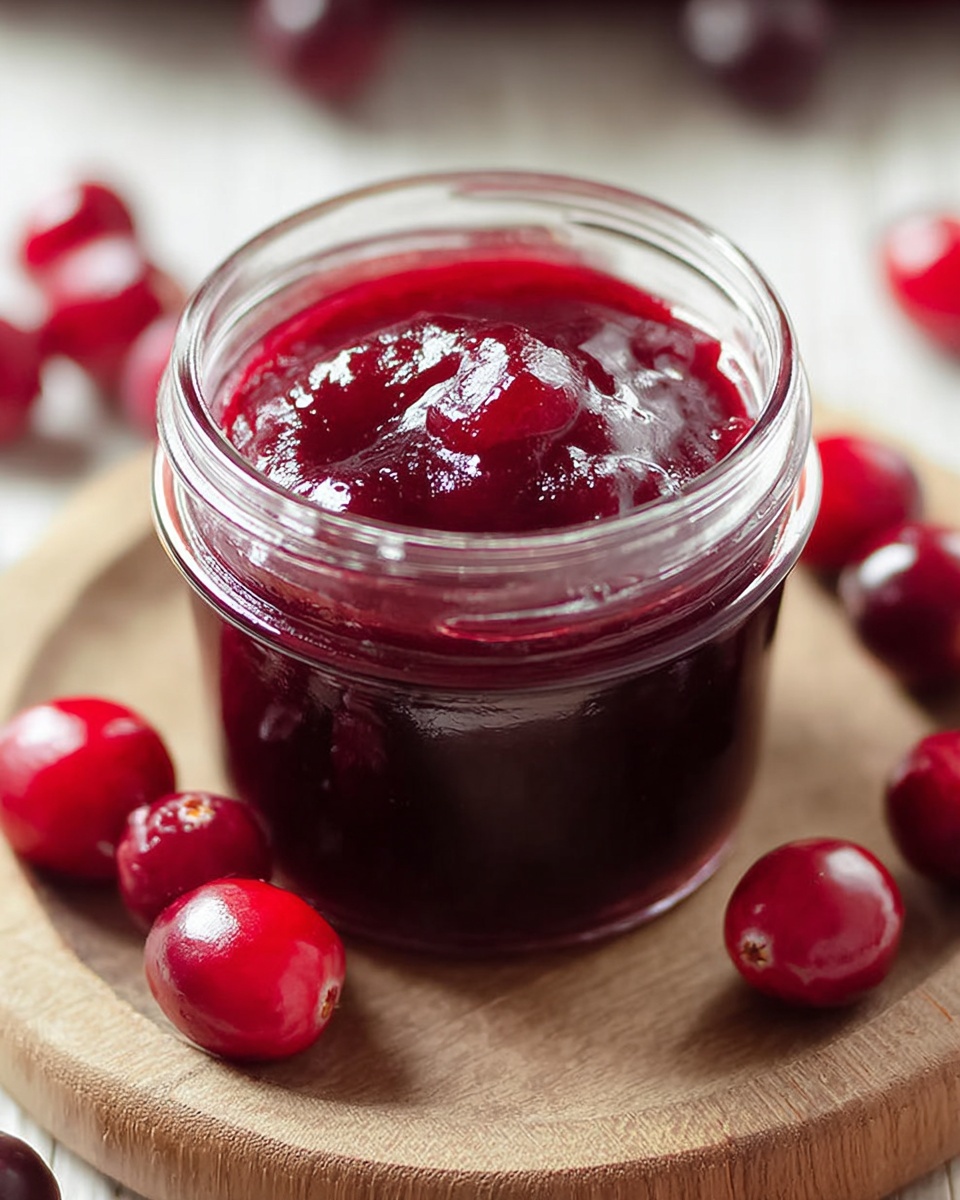
If you’ve ever wished for a homemade spread that captures the bright, tangy sweetness of fresh fruit in every spoonful, this Cherry Jam Recipe is your new best friend. Made from luscious pitted cherries, a touch of sugar, fresh lemon juice, and a little fruit pectin magic, it’s a kitchen-winning treat that transforms simple ingredients into a glorious, jewel-toned jam. It’s perfect for spreading on toast, dolloping on yogurt, or even stirring into desserts for a burst of summery flavor.
Ingredients You’ll Need
Making this Cherry Jam Recipe requires just a handful of simple, quality ingredients that each play a crucial role in delivering that perfect balance of sweet, tart, and jammy goodness. Every item contributes its own special touch to the taste, texture, and beautiful color of your finished batch.
- 4 cups fresh cherries (pitted): The star of the show, providing natural sweetness, vibrant color, and fresh flavor.
- 1 ½ cups granulated sugar: Adds sweetness and helps with the jam’s preservation while enhancing the cherry’s natural juices.
- 2 tablespoons lemon juice (freshly squeezed): Brings brightness and acidity that balances the sweetness and helps set the jam.
- 1 package (1.75 oz) fruit pectin: Essential for thickening the jam and achieving that perfect spreadable consistency.
How to Make Cherry Jam Recipe
Step 1: Prepare the Cherries
Begin by washing your fresh cherries thoroughly. Then, remove the pits either by using a cherry pitter or slicing the cherries in half. This step ensures your jam is smooth and easy to enjoy without any unexpected bites.
Step 2: Mix Cherries, Sugar, and Lemon Juice
In a large pot, combine the pitted cherries with the granulated sugar and freshly squeezed lemon juice. Stir everything together well and let the mixture sit for about 30 minutes. This resting time allows the cherries to release their natural juices, which is critical for that rich, flavorful base.
Step 3: Heat the Mixture
Place the pot over medium heat and start heating the mixture. Stir frequently to prevent sticking and cook until it begins to boil. This step helps dissolve the sugar fully and blend the flavors.
Step 4: Add the Fruit Pectin
Once the mixture reaches boiling, sprinkle in the fruit pectin according to the package instructions. Continue cooking and stirring until the jam hits a rolling boil again, which means it won’t stop bubbling when stirred—this is when the pectin activates to thicken your jam.
Step 5: Test for Doneness
To check if your jam is ready, use the classic cold plate test. Spoon a bit of jam onto a chilled plate and push it gently with your finger. If the surface wrinkles and holds, congratulations, your jam has set perfectly!
Step 6: Jar and Seal
Spoon the hot cherry jam into sterilized jars and seal them tightly. For safety and longer storage, process the jars in a boiling water bath for 5 to 10 minutes. Afterwards, let the jars cool at room temperature, and watch your delicious jam set beautifully.
How to Serve Cherry Jam Recipe
Garnishes
Enhance your Cherry Jam Recipe with garnishes like fresh mint leaves for a burst of color and a hint of herbal freshness. A sprinkle of chopped nuts like toasted almonds or pistachios can add a delightful textural contrast that’s perfect for spooning over desserts.
Side Dishes
This cherry jam pairs wonderfully with simple sides such as crusty artisan bread or buttery croissants. It also complements cheese boards with varieties like brie, goat cheese, or sharp cheddar, offering a sweet and tangy counterpoint.
Creative Ways to Present
Try swirling cherry jam into warm oatmeal or ice cream to elevate your breakfast or dessert. Or use it as a glaze for roasted meats like pork or chicken, infusing your dishes with a glossy, fruity finish that’s sure to impress.
Make Ahead and Storage
Storing Leftovers
If you have any cherry jam left after the first few days, keep it refrigerated in airtight jars to maintain freshness. Properly sealed, it will stay delicious for up to three weeks.
Freezing
For longer storage, cherry jam freezes beautifully. Use freezer-safe containers, leaving some space for expansion, and thaw in the refrigerator before use. Freezing helps retain that fresh flavor so you can enjoy your jam months later.
Reheating
If your jam thickens too much after refrigeration or freezing, gently warm it over low heat while stirring to restore a smooth, spreadable texture. Avoid boiling again, as it can degrade the fresh cherry flavor.
FAQs
Can I use frozen cherries instead of fresh for this Cherry Jam Recipe?
Absolutely! Frozen cherries work well and are often picked at peak ripeness. Just thaw and drain any excess liquid before starting your jam to avoid a watery batch.
What if I want a seedless jam but don’t have a cherry pitter?
You can halve the cherries and carefully remove pits with a small knife or spoon. It takes a bit more time but ensures every bite is smooth and pit-free.
How do I know when the jam is safe to store without refrigeration?
Properly processing sealed jars in a boiling water bath sterilizes the jam, making it shelf-stable for up to a year. Always check seals and store jars in a cool, dark place.
Can I reduce the sugar in this Cherry Jam Recipe?
You can reduce sugar slightly, but keep in mind that sugar acts as both a sweetener and a preservative. Reducing it too much could affect the texture and shelf-life of your jam.
Is it necessary to use lemon juice?
Yes, lemon juice adds acidity that brightens the flavor and helps the pectin set the jam properly. Freshly squeezed is best for that clean, zesty touch.
Final Thoughts
This Cherry Jam Recipe is such a joy to make and even more fun to share. With its vibrant color, luscious texture, and perfectly balanced flavor, it’s a homemade delight that will brighten any meal or snack. Give it a try—you might just find it becoming your new kitchen staple!
Print
Cherry Jam Recipe
- Prep Time: 15 minutes
- Cook Time: 30 minutes
- Total Time: 45 minutes
- Yield: 2 cups (approximately 2 servings)
- Category: Condiment
- Method: Stovetop
- Cuisine: American
- Diet: Vegetarian
Description
A classic homemade cherry jam recipe that captures the sweet and tart flavors of fresh cherries. This simple stovetop method creates a delicious, spreadable jam perfect for toast, pastries, or as a topping for desserts. Using fresh cherries, lemon juice, sugar, and fruit pectin, this jam balances natural fruit flavors with the ideal gel texture.
Ingredients
Jam Ingredients
- 4 cups fresh cherries (pitted)
- 1 ½ cups granulated sugar
- 2 tablespoons lemon juice (freshly squeezed)
- 1 package (1.75 oz) fruit pectin
Instructions
- Prepare Cherries: Wash and pit the cherries using a cherry pitter or cut them in half to remove the pits. This ensures your jam will be smooth and easy to eat.
- Mix Ingredients: In a large pot, combine the pitted cherries, granulated sugar, and freshly squeezed lemon juice. Stir everything well and let the mixture sit for 30 minutes to allow the cherries to release their natural juices.
- Heat Mixture: Place the pot over medium heat and bring the mixture to a boil, stirring frequently to dissolve the sugar and prevent sticking.
- Add Pectin: Once the mixture reaches a boil, stir in the fruit pectin according to the package instructions. Continue boiling the mixture until it reaches a rolling boil again to activate the pectin’s gelling properties.
- Test for Doneness: Use the cold plate test by placing a small spoonful of jam on a chilled plate. Push it gently with your finger; if the jam wrinkles, it’s ready to be removed from heat.
- Jar the Jam: Ladle the hot jam into sterilized jars, seal them tightly with lids, and process them in a boiling water bath for 5-10 minutes to preserve and ensure safe storage.
Notes
- Make sure to sterilize jars properly to avoid contamination and extend shelf life.
- Adjust sugar according to your taste or use fruit pectin varieties suitable for low-sugar recipes.
- Use the cold plate test carefully to ensure jam consistency before removing it from heat.
- Once opened, keep the jam refrigerated and consume within a few weeks.
- This jam can be customized by mixing in other berries or flavor extracts like vanilla or almond.
