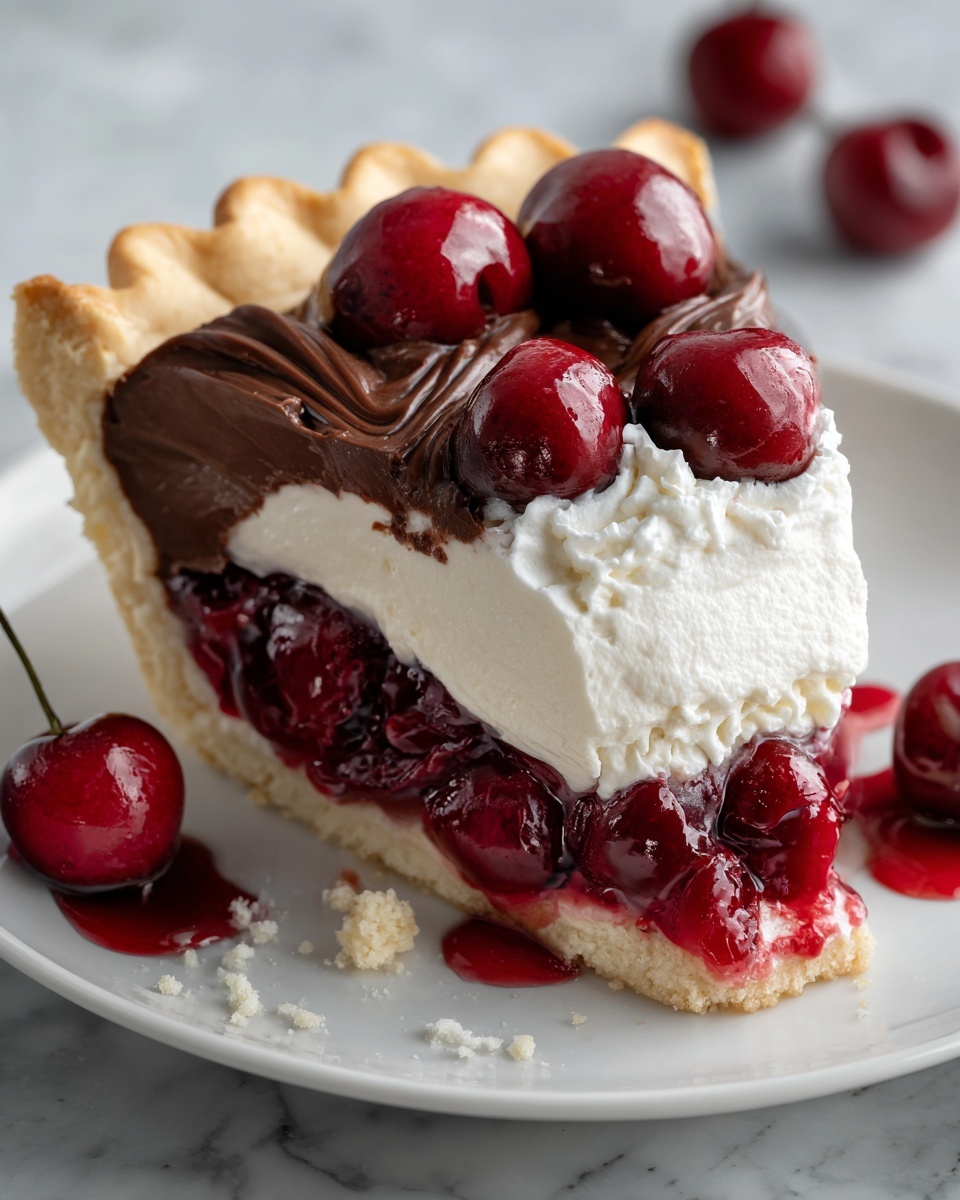
If you are craving a dessert that combines rich chocolate and luscious cherries in perfect harmony, the Chocolate Cherry Pie Bliss Recipe is exactly what you need. This indulgent pie delivers a decadent, silky chocolate filling swirled with sweet cherry pie filling, all nestled in a crisp chocolate cookie crust. With every bite, you experience a delightful play of flavors and textures that feel both comforting and elegant. Whether it’s a celebratory occasion or a cozy night in, this pie is sure to become your go-to dessert for sharing joy and sweetness.
Ingredients You’ll Need
Keeping this pie simple yet spectacular is all about using the right ingredients. Each component is carefully chosen to build layers of flavor and texture, from the crumbly chocolate crust to the creamy filling and bright cherry topping.
- Chocolate cookie crumbs: These form the base of the crust, bringing a satisfying crunch and intense cocoa flavor—Oreos work perfectly.
- Granulated sugar: Just the right amount to balance sweetness in the crust without overpowering the chocolate.
- Unsalted butter: Melts into the cookie crumbs, binding everything into a buttery, firm crust.
- Heavy cream: Provides richness and smooth texture to the chocolate filling.
- Semi-sweet or dark chocolate: The star ingredient for a luxurious, deep chocolate flavor.
- Cream cheese: Adds creamy tang and silkiness to the filling.
- Vanilla extract: Enhances all the flavors with its warm, sweet aroma.
- Cherry pie filling: Both for folding into the filling and topping the pie, it introduces vibrant color and a burst of fruity sweetness.
- Chocolate shavings or curls (optional): A pretty garnish that adds texture and extra chocolate appeal.
How to Make Chocolate Cherry Pie Bliss Recipe
Step 1: Make the Crust
Start by preheating your oven to 350°F (175°C). In a mixing bowl, combine the chocolate cookie crumbs, granulated sugar, and melted butter. Stir until the crumbs are moistened and hold together when pressed. Press the mixture firmly into the bottom and up the sides of a 9-inch pie pan to form an even crust. Bake it for 8 to 10 minutes, allowing it to set and develop a bit more crunch. After baking, let the crust cool completely—this ensures your filling won’t melt the base later on.
Step 2: Prepare the Chocolate Filling
Pour the heavy cream into a saucepan and gently heat it over medium until it just begins to simmer; watch closely so it doesn’t boil. Remove from heat and immediately add the chopped chocolate. Let it sit for a minute to soften, then stir carefully until a smooth, glossy ganache forms. This luscious chocolate base is what makes the pie irresistibly silky.
Step 3: Combine Cream Cheese and Chocolate
In a separate bowl, beat the cream cheese until completely smooth and creamy—no lumps here! Add in the vanilla extract for that subtle, cozy note. Next, gradually beat in the warm chocolate ganache until everything is fully blended into a rich, silky filling that will melt in your mouth.
Step 4: Fold in the Cherry Pie Filling
Gently fold 1½ cups of the cherry pie filling into the chocolate mixture. This gives the filling bursts of fruity sweetness and a beautiful marbled effect that looks as stunning as it tastes. Pour the entire mixture evenly into the cooled crust, smoothing the top for a flawless finish. Pop the pie into the refrigerator and chill it for at least 3 hours to allow it to set perfectly into that signature Chocolate Cherry Pie Bliss Recipe texture.
Step 5: Add the Cherry Topping
Once your pie is nicely set, spread the remaining 1 cup of cherry pie filling over the top as a vibrant, jewel-like glaze. If you’re in the mood to go all out, sprinkle some chocolate shavings or curls on top for an elegant garnish. After topping, chill the pie for an additional 30 minutes before serving to let the flavors meld beautifully.
How to Serve Chocolate Cherry Pie Bliss Recipe
Garnishes
Simple garnishes can elevate this pie from divine to breathtaking. Chocolate shavings or curls add a lovely texture contrast and make the presentation festive. Fresh cherries can also be added for an extra burst of color and flavor that pairs perfectly with the rich filling.
Side Dishes
This pie shines on its own but pairs beautifully with a scoop of vanilla ice cream or a dollop of freshly whipped cream to balance the richness. For a lighter touch, serve with a crisp green salad or fresh fruit to refresh the palate between bites.
Creative Ways to Present
Try slicing the pie and serving it in clear glass dishes to show off the gorgeous layers of chocolate and cherry filling. You can also offer mini versions in individual tart pans for parties, or create a dessert platter with assorted berries and chocolate-dipped cherries alongside for a decadent experience.
Make Ahead and Storage
Storing Leftovers
Leftover Chocolate Cherry Pie Bliss Recipe should be covered tightly with plastic wrap or stored in an airtight container and kept in the refrigerator. It will maintain its perfect texture and flavor for up to 3 days, making it a great make-ahead dessert for busy schedules.
Freezing
This pie freezes well if you want to prepare it in advance. Wrap it securely in several layers of plastic wrap and then foil to prevent freezer burn. When you’re ready to enjoy, thaw overnight in the refrigerator. Avoid freezing the cherry topping separately if possible, as it may change texture upon thawing.
Reheating
Since this is a chilled pie, it’s best enjoyed cold or at room temperature. If you’d like to warm it slightly, let it sit out for 10 to 15 minutes to soften rather than applying direct heat, which could melt the ganache and alter the consistency.
FAQs
Can I use fresh cherries instead of canned cherry pie filling?
Fresh cherries are wonderful but they lack the sweetness and syrupy texture of canned pie filling. If you prefer fresh, consider making your own cherry compote with sugar and a bit of cornstarch to replicate the consistency.
Is it possible to make this pie vegan or dairy-free?
Yes! Substitute the butter with a plant-based margarine, use dairy-free chocolate and cream alternatives like coconut cream, and opt for vegan cream cheese to keep the luscious texture while making it vegan-friendly.
How long does this pie take to set properly?
Chilling for at least 3 hours is essential for the filling to firm up nicely, with an additional 30 minutes after adding the cherry topping recommended for the best sliceability and flavor melding.
Can I prepare the pie crust without baking?
The baking step in the crust preparation helps it hold together and develop a firmer texture. While you might skip baking in a pinch, the crust may be softer and less crisp, affecting the overall texture balance of the pie.
What type of chocolate works best for this recipe?
Semi-sweet or dark chocolate is ideal as it provides the perfect balance of richness and slight bitterness to offset the sweetness of the cherries. Use good quality chocolate for the best results.
Final Thoughts
Nothing compares to the joy of biting into a slice of this Chocolate Cherry Pie Bliss Recipe, where silky chocolate and bright cherry flavors come together to create an unforgettable dessert experience. Easy enough to make for special gatherings but impressive enough to feel like a treat, it’s a recipe you’ll want to keep close to your heart. Go ahead and whip up this pie to share a little bliss with your loved ones—you won’t regret it!
Print
Chocolate Cherry Pie Bliss Recipe
- Prep Time: 20 minutes
- Cook Time: 10 minutes
- Total Time: 4 hours 30 minutes
- Yield: 8 servings
- Category: Dessert
- Method: Baking
- Cuisine: American
Description
This Chocolate Cherry Pie Bliss features a rich chocolate cookie crust filled with a luscious blend of dark chocolate, cream cheese, and cherry pie filling. Topped with a vibrant layer of cherry pie filling and optional chocolate curls, this dessert combines the deep flavors of chocolate and sweet-tart cherries for an irresistible treat perfect for special occasions or any dessert table.
Ingredients
For the Crust:
- 1½ cups chocolate cookie crumbs (e.g., Oreos, finely crushed)
- ¼ cup granulated sugar
- 6 tbsp unsalted butter, melted
For the Chocolate Cherry Filling:
- 1 cup heavy cream
- 8 oz semi-sweet or dark chocolate, chopped
- 4 oz cream cheese, softened
- ½ tsp vanilla extract
- 1½ cups cherry pie filling (canned or homemade)
For the Cherry Topping:
- 1 cup cherry pie filling
- Shaved chocolate or chocolate curls (optional, for garnish)
Instructions
- Make the Crust: Preheat your oven to 350°F (175°C). In a mixing bowl, combine the chocolate cookie crumbs, granulated sugar, and melted butter until all ingredients are well incorporated. Press this mixture evenly into the bottom and up the sides of a 9-inch pie pan to form the crust. Bake the crust in the preheated oven for 8 to 10 minutes. Remove and allow it to cool completely before adding the filling.
- Prepare the Chocolate Filling: Pour the heavy cream into a saucepan and heat over medium heat until it just starts to simmer, being careful not to boil. Remove the saucepan from the heat and add the chopped semi-sweet or dark chocolate. Let it sit undisturbed for 1 minute to melt, then stir until the mixture is smooth and glossy.
- Mix Filling with Cream Cheese: In a separate bowl, beat the softened cream cheese until smooth and creamy. Add the vanilla extract, then gradually beat in the melted chocolate mixture until fully blended and silky in texture.
- Incorporate Cherry Pie Filling: Gently fold 1½ cups of cherry pie filling into the chocolate and cream cheese mixture to combine them evenly without breaking up the cherries too much.
- Assemble Pie: Pour the chocolate cherry filling into the pre-baked, cooled crust. Smooth the top with a spatula to create an even layer. Refrigerate the pie for at least 3 hours to allow the filling to set firmly.
- Top the Pie: After the filling has set, spread 1 cup of cherry pie filling over the top of the pie in an even layer. If desired, sprinkle with shaved chocolate or chocolate curls to garnish and add an elegant touch.
- Final Chill: Place the pie back into the refrigerator and chill for an additional 30 minutes before serving. This ensures the topping is set and the pie is perfect for slicing and serving.
Notes
- For a homemade twist, you can replace store-bought cherry pie filling with fresh cherries cooked down with sugar and a thickener like cornstarch.
- Ensure the pie crust is completely cool before adding the filling to avoid melting or softening the filling prematurely.
- You can use milk chocolate instead of dark chocolate for a sweeter filling, though semi-sweet complements the tart cherries well.
- Store the pie refrigerated and consume within 3 days for optimal freshness.
- For an extra festive look, consider adding whipped cream dollops around the pie edges before serving.

