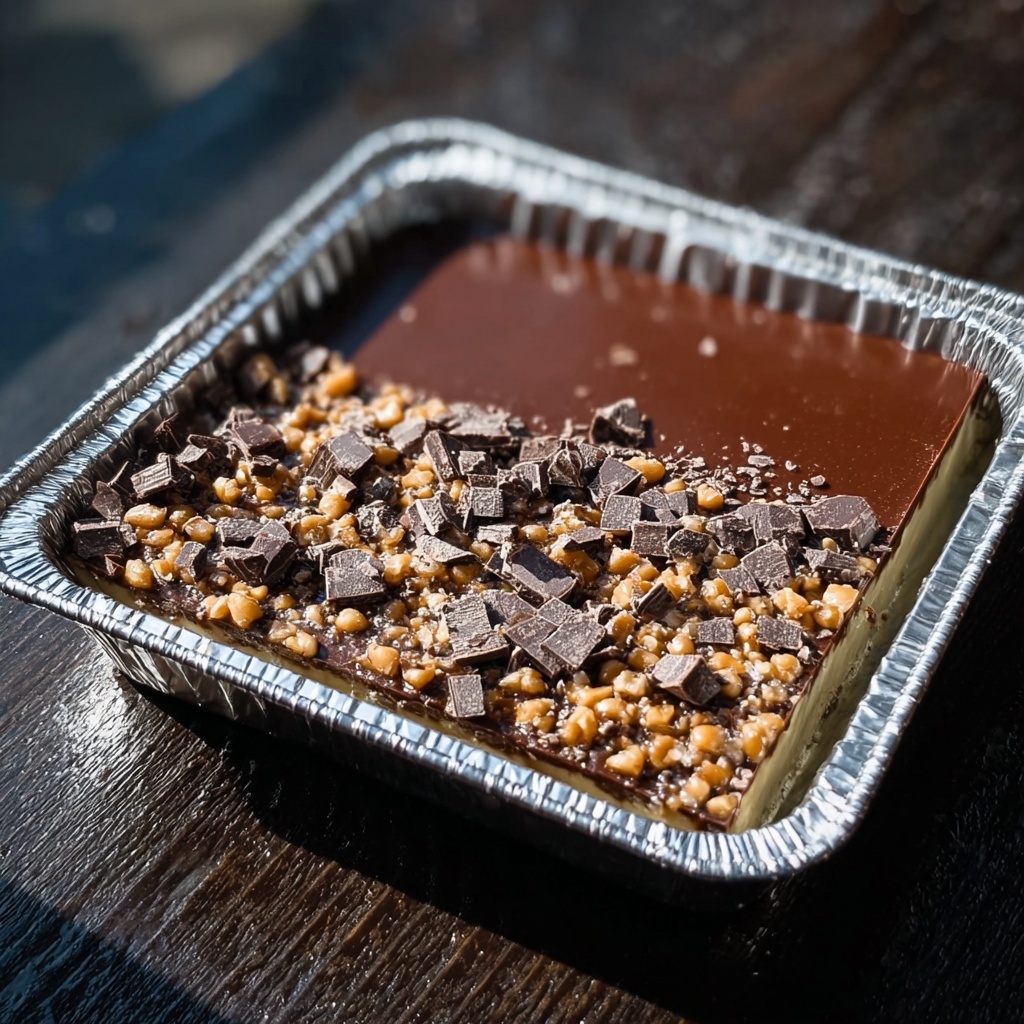
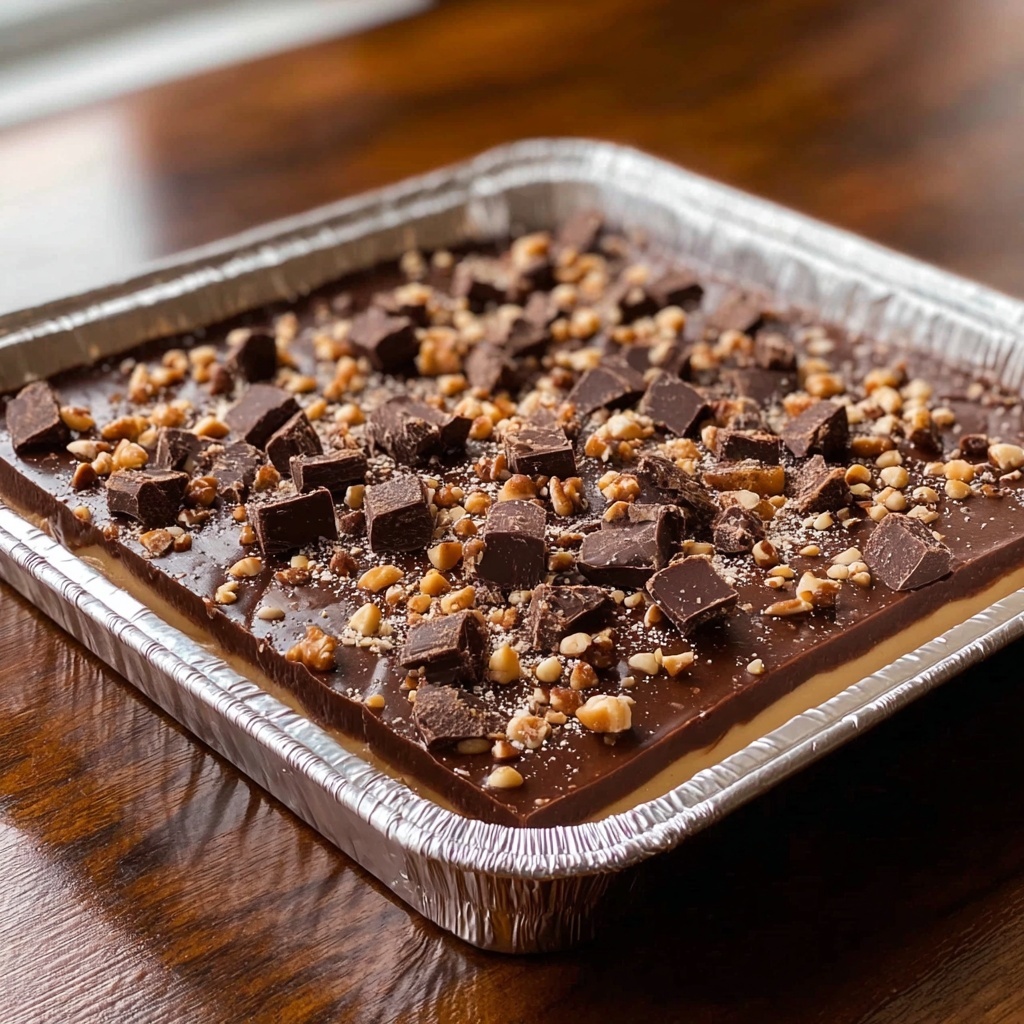
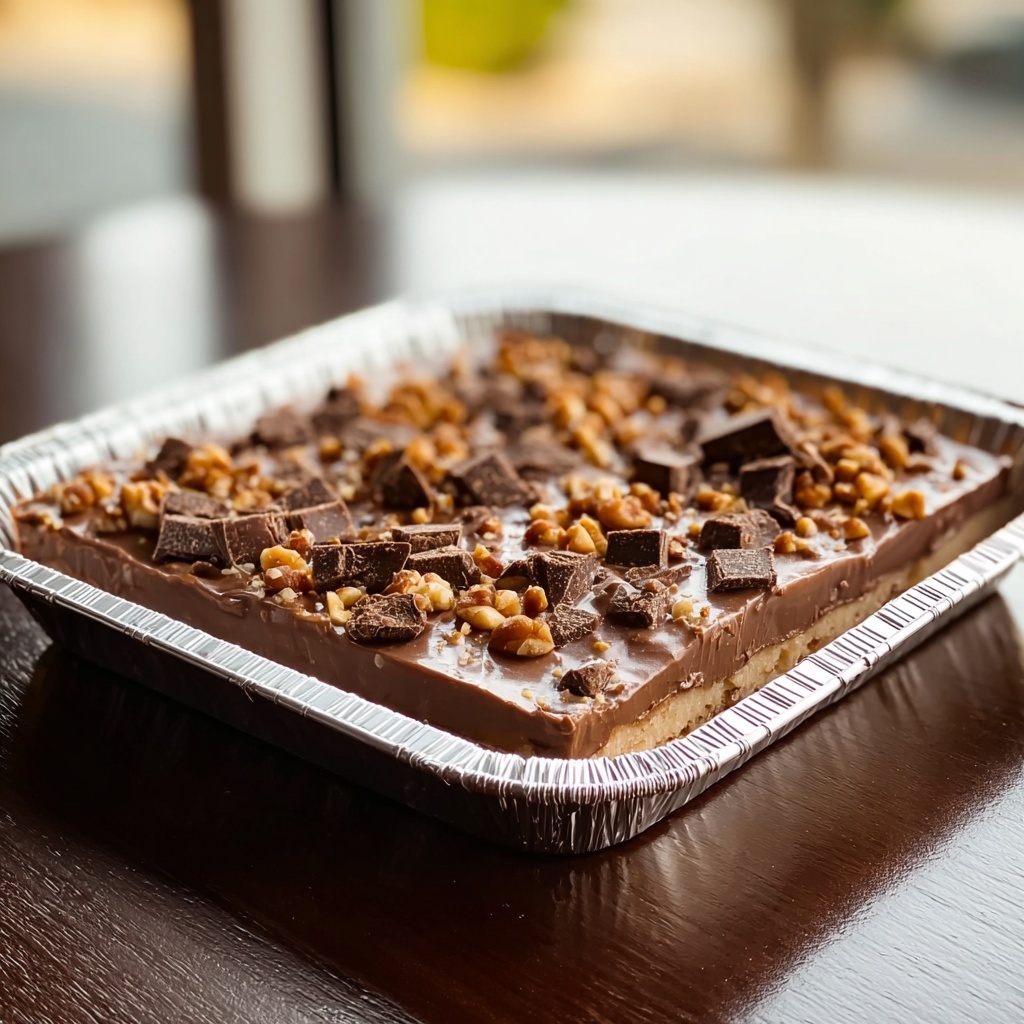
If you have a craving for something irresistibly rich and delightfully nutty, this Easy Chocolate Walnut Fudge Recipe is exactly what you need. It’s a luscious treat that combines the creamy depth of semisweet chocolate with the satisfying crunch of toasted walnuts, brought together with a touch of vanilla sweetness. Perfect for sharing or savoring a special moment, this fudge balances simple ingredients and quick preparation to deliver a melt-in-your-mouth experience that feels like a warm hug in dessert form.
Ingredients You’ll Need
These ingredients are straightforward but essential for creating that perfect harmony of chocolatey richness and crunchy texture. Each element plays a unique role, from the silky melted chocolate to the buttery softness and the lively snap of walnuts making every bite unforgettable.
- 3 cups semisweet chocolate chips: The heart of your fudge, offering smooth, deep chocolate flavor that melts beautifully.
- 1 (14 ounces) can sweetened condensed milk: Adds creamy sweetness and helps achieve that classic fudge texture without any graininess.
- 1/4 cup butter: Enriches the fudge with a velvety mouthfeel and subtle richness.
- 1 cup chopped walnuts: Provides a wonderful crunch and nutty contrast that lifts the chocolate perfectly.
- 1 teaspoon vanilla extract: Enhances all the flavors with a warm, aromatic touch that makes the fudge truly irresistible.
How to Make Easy Chocolate Walnut Fudge Recipe
Step 1: Prepare Your Pan
Start by greasing an 8-inch square baking pan thoroughly. This step helps ensure your fudge will come out easily once it’s firm without sticking or breaking apart.
Step 2: Melt the Base
In a saucepan on low heat, combine the semisweet chocolate chips, sweetened condensed milk, and butter. Stir continuously until everything melts together into a smooth, glossy mixture. Patience here is key; low heat prevents the chocolate from seizing or burning, giving you the perfect silky fudge base.
Step 3: Add the Flavor Boosters
Once the chocolate mixture is smooth and completely melted, take it off the heat. Stir in the chopped walnuts and vanilla extract. This is when your fudge starts to come alive with texture and a fragrant hint of vanilla that deepens the chocolate flavor.
Step 4: Transfer and Chill
Pour the fudge mixture into your prepared pan and spread it evenly with a spatula. This step helps the fudge set uniformly, ensuring every piece is just as decadent as the last. Pop it into the refrigerator for at least 2 hours, or until firm enough to cut.
Step 5: Cut and Enjoy
After chilling, remove the fudge from the pan and slice it into 16 squares. These bite-sized pieces are perfectly portioned for sharing — or keeping all to yourself, no judgment here!
How to Serve Easy Chocolate Walnut Fudge Recipe
Garnishes
To give your fudge an extra special touch, consider sprinkling a few chopped walnuts or a light dusting of cocoa powder on top before chilling. You could also add a few sea salt flakes to contrast the sweetness, creating an elegant flavor twist that surprises and delights.
Side Dishes
This fudge pairs wonderfully with simple accompaniments that balance its richness. Think fresh berries for a burst of brightness, or a scoop of vanilla ice cream for a classic indulgence. A cup of strong black coffee or herbal tea can also be perfect to cleanse the palate between bites.
Creative Ways to Present
Try arranging your fudge squares on a decorative platter lined with parchment paper or festive doilies, especially for holiday gatherings or cozy get-togethers. Wrapping individual pieces in colorful wax paper ribbons makes charming homemade gifts that friends and family will treasure.
Make Ahead and Storage
Storing Leftovers
After enjoying some of your delicious fudge, store the leftovers in an airtight container at room temperature or in the refrigerator. Proper storage keeps it fresh and chewy for up to two weeks, making it easy to nibble on for days to come.
Freezing
If you want to keep your fudge even longer, you can freeze it. Wrap the pieces tightly in plastic wrap and place them in a freezer-safe bag or container. Frozen fudge keeps well for up to three months, and thawing is easy — simply leave it at room temperature for about an hour before serving.
Reheating
Fudge is best enjoyed at room temperature, but if it’s too firm straight from the fridge or freezer, gently warm it by placing the wrapped fudge near a warm spot in your kitchen or by briefly microwaving for a few seconds. This softens the fudge without melting it completely, bringing back that perfect, creamy texture.
FAQs
Can I use different nuts instead of walnuts?
Absolutely! Pecans, almonds, or hazelnuts work wonderfully too and each adds its own unique flavor and texture. Feel free to swap walnuts out based on your preference or what you have on hand.
Is this fudge gluten-free?
Yes, this Easy Chocolate Walnut Fudge Recipe uses ingredients that are naturally gluten-free. Just double-check your chocolate chips and other store-bought ingredients to be certain they have no gluten-containing additives.
How long does it take for the fudge to set properly?
You should allow at least 2 hours in the refrigerator for the fudge to firm up completely. For best results, chilling overnight is ideal if you want firmer, easier-to-cut squares.
What can I do if my fudge turns out grainy?
Graininess can happen if the chocolate is overheated or stirred too vigorously. To avoid this, melt everything slowly over low heat and stir gently. Using good quality chocolate chips and condensed milk also helps maintain a smooth texture.
Can I make this fudge ahead of time for a party?
Definitely! This fudge is fantastic for making in advance since it stores so well. Prepare it a couple of days before your event, keep it refrigerated, and bring it out right when your guests arrive for the freshest taste and easiest serving.
Final Thoughts
There’s something truly comforting about this Easy Chocolate Walnut Fudge Recipe that makes you want to share it with everyone you love. It’s simple, quick, and so satisfying — a homemade indulgence that turns everyday moments into special memories. Give this recipe a try, and I promise it will become your go-to for fudge every time the craving strikes.
Print
Easy Chocolate Walnut Fudge Recipe
- Prep Time: 10 minutes
- Cook Time: 10 minutes
- Total Time: 2 hours 20 minutes
- Yield: 16 servings
- Category: Dessert
- Method: Stovetop
- Cuisine: American
Description
This Easy Chocolate Walnut Fudge is a rich and creamy homemade treat that combines semisweet chocolate, sweetened condensed milk, butter, and crunchy walnuts for a perfect balance of smooth and nutty flavors. Perfect for satisfying chocolate cravings with minimal effort, this fudge can be prepared quickly on the stovetop and chilled to set into delicious squares.
Ingredients
Fudge Ingredients
- 3 cups semisweet chocolate chips
- 1 (14 ounces) can sweetened condensed milk
- 1/4 cup butter
- 1 cup chopped walnuts
- 1 teaspoon vanilla extract
Instructions
- Prepare the Pan: Grease an 8-inch square baking pan thoroughly to prevent the fudge from sticking, ensuring easy removal once set.
- Melt Ingredients: In a saucepan over low heat, combine the semisweet chocolate chips, sweetened condensed milk, and butter. Stir continuously until the mixture is melted completely and smooth without any lumps.
- Add Flavors: Remove the saucepan from heat and stir in the chopped walnuts and vanilla extract until evenly incorporated throughout the fudge mixture.
- Pour Mixture: Spread the chocolate mixture evenly into the prepared pan, smoothing the top for an even thickness.
- Chill to Set: Place the pan in the refrigerator and chill for at least 2 hours, or until the fudge is firm and can be cut cleanly.
- Serve: Once set, cut the fudge into 16 equal squares and enjoy this decadent treat.
Notes
- Use a rubber spatula to spread the fudge evenly in the pan for best results.
- Walnuts can be substituted with pecans or omitted for a nut-free version.
- Store fudge in an airtight container in the refrigerator for up to 2 weeks.
- Allow fudge to sit at room temperature for a few minutes before serving for a softer texture.
- For a glossy finish, melt the fudge mixture until just smooth to avoid graininess.


