If you’re looking for a delightful and nutritious way to pamper your furry friend on a warm day, this Homemade Dog Ice Cream Recipe is a total game-changer. Packed with wholesome ingredients like ripe bananas, creamy Greek yogurt, and peanut butter that’s safe for dogs, this recipe creates a cool treat your pup will absolutely adore. It’s simple to make yet feels special, offering a tasty break from regular snacks and a fun way to show some extra love. Whether it’s a sunny afternoon or a special occasion, this homemade ice cream is sure to bring smiles all around.

Ingredients You’ll Need
Believe it or not, crafting this Homemade Dog Ice Cream Recipe requires just a handful of simple, everyday ingredients. Each component plays a vital role, from adding natural sweetness to creating a smooth texture that’s easy for your dog to enjoy.
- 2 ripe bananas: Naturally sweet and packed with potassium, bananas make the base of the ice cream irresistibly tasty and soft.
- 1 cup plain Greek yogurt: Adds creaminess and contributes probiotics that support your dog’s digestive health.
- 1/2 cup peanut butter (unsweetened and xylitol-free): Offers rich flavor and healthy fats; be sure it’s dog-safe to keep your pup happy and healthy.
- 1/4 cup water: Helps blend everything smoothly without watering down flavor—just enough for perfect consistency.
How to Make Homemade Dog Ice Cream Recipe
Step 1: Blend the Ingredients
Start by combining the ripe bananas, plain Greek yogurt, peanut butter, and water into a blender or food processor. Blend everything until you get a smooth and creamy mixture, free of lumps. This mixture is the heart of your Homemade Dog Ice Cream Recipe, so aim for a consistency that’s thick enough to hold its shape once frozen but still easy to scoop into molds.
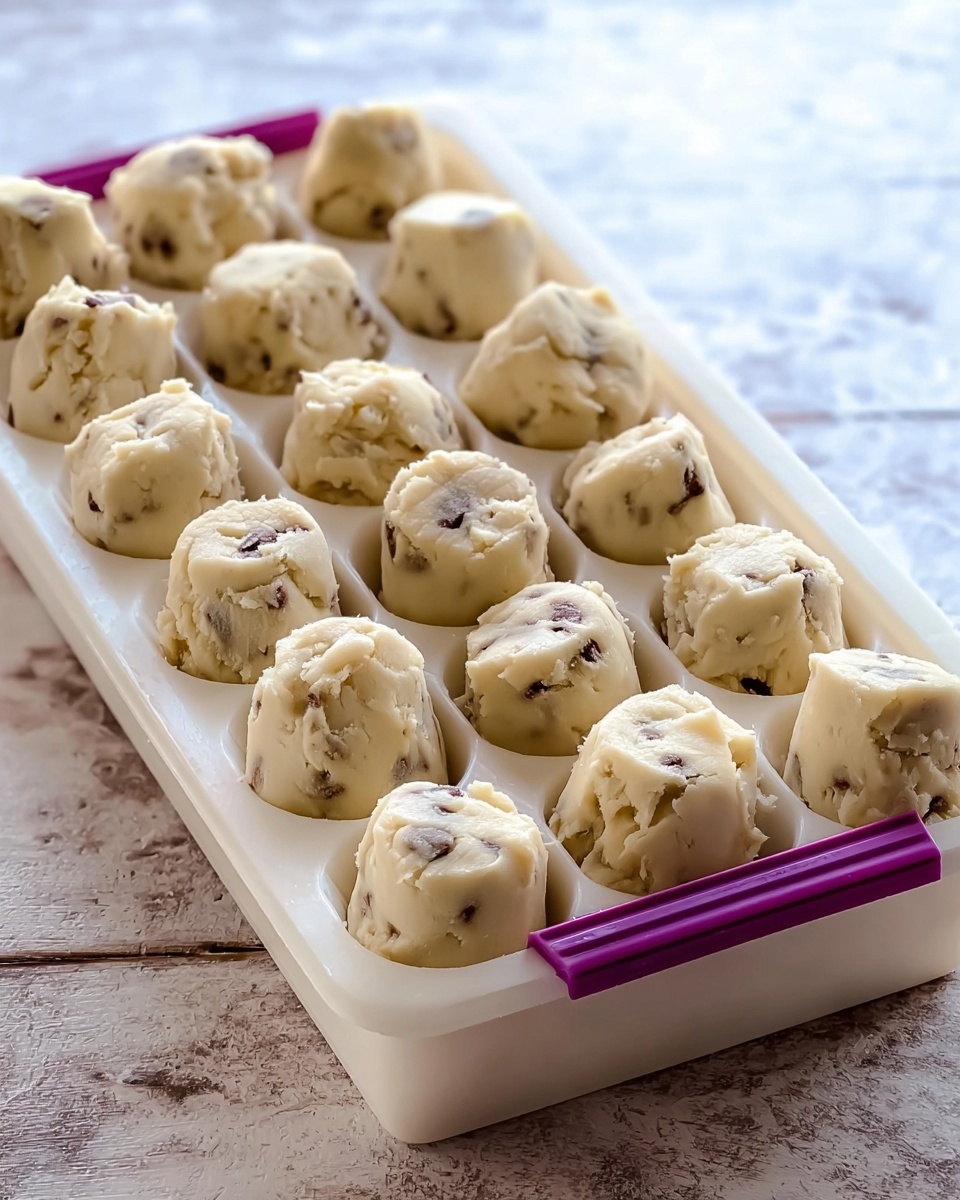
Step 2: Fill the Molds
Pour the smooth mixture into ice cube trays or silicone molds. Using silicone molds shaped like bones or paw prints makes the treat even more adorable and entertaining for your dog. Make sure to fill each cavity evenly for consistent freezing and easy portion control.
Step 3: Freeze
Place your filled molds in the freezer and leave them to set for at least 2 hours. This step ensures the ice cream is solid and ready to be enjoyed as a cool, refreshing snack that your dog will love on any sunny day.
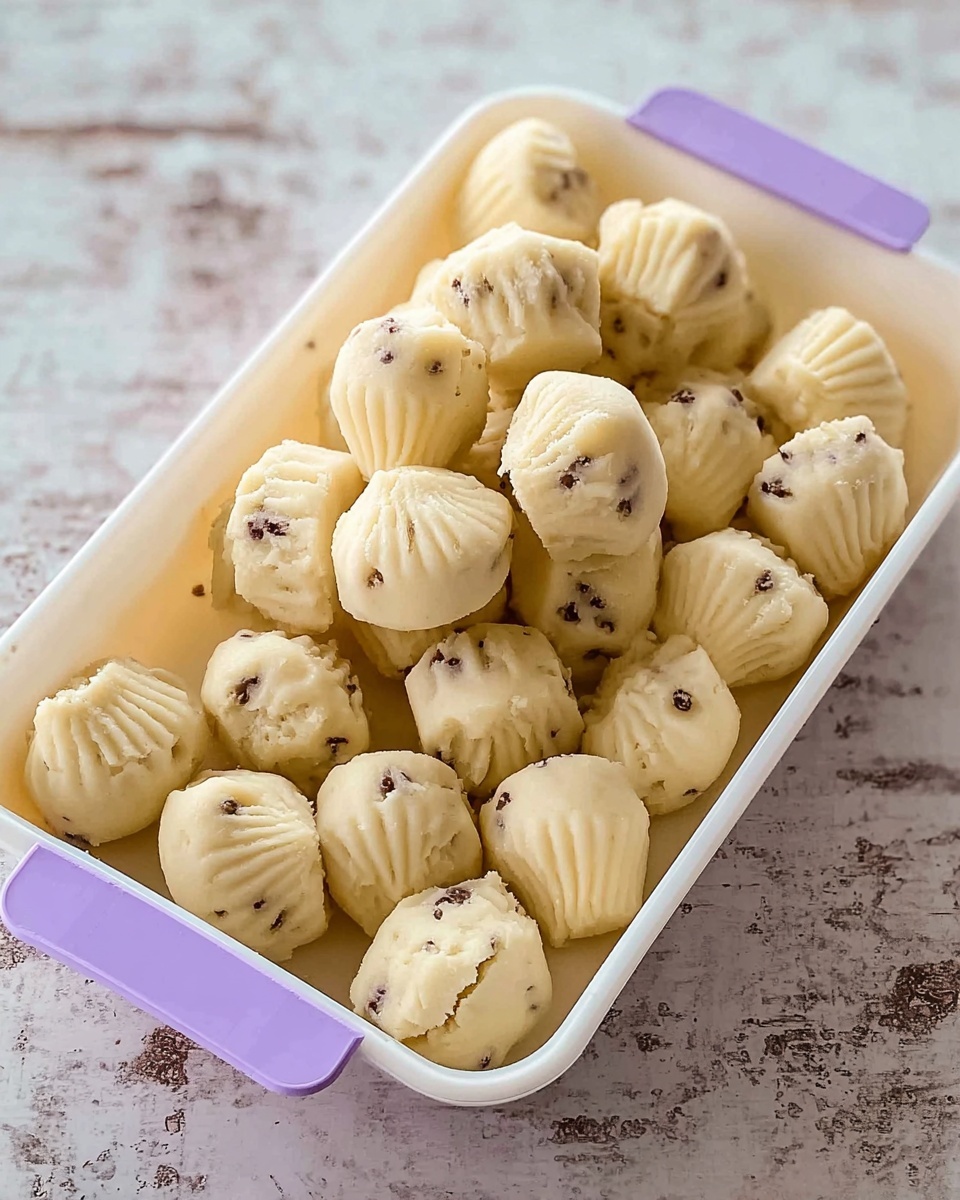
Step 4: Serve
Once frozen, simply pop the ice cream cubes or shapes out of the molds. These little frozen treats are perfect to serve as a reward after a walk or just to help your pup cool down when it’s hot outside.
How to Serve Homemade Dog Ice Cream Recipe
Garnishes
If you want to elevate the experience, consider topping your dog’s ice cream with a sprinkle of crushed unsalted peanuts or a few fresh blueberries. These garnishes add a bit of texture and flavor variety, making treat time even more exciting.
Side Dishes
This ice cream can be paired wonderfully with regular kibble served at room temperature, or alongside fresh slices of apple or carrot sticks for a balanced and colorful snack combo that keeps your furry friend engaged and satisfied.
Creative Ways to Present
For a special occasion, try serving the ice cream shapes atop a shallow dish filled with crushed ice, creating a fun “ice cream sundae” vibe. Using colorful silicone molds or even customizing the shapes with festive themes can make treat time a memorable event both for you and your dog.
Make Ahead and Storage
Storing Leftovers
Leftover homemade dog ice cream can be stored in an airtight container in the freezer. Keeping them sealed well prevents any freezer odors from affecting the flavor, so your dog enjoys every lick as fresh as the first.
Freezing
When freezing, make sure the molds are placed on a flat surface to avoid uneven shapes. For long-term storage, transfer the frozen pieces into a freezer bag after they’ve solidified to save space and maintain their quality.
Reheating
Since this is a frozen treat, reheating isn’t necessary. However, if the ice cream is too hard for your dog to enjoy, simply let it sit at room temperature for a few minutes until it softens slightly. This makes it easier to nibble without losing that refreshing chill.
FAQs
Is this Homemade Dog Ice Cream Recipe safe for all dogs?
Yes, this recipe uses dog-safe ingredients like bananas, plain Greek yogurt, and xylitol-free peanut butter. However, always check with your vet if your dog has specific allergies or dietary restrictions before trying new treats.
Can I substitute Greek yogurt with regular yogurt?
Greek yogurt is preferred due to its thicker texture and higher protein content, but plain regular yogurt without added sugars or artificial sweeteners can work in a pinch. Just make sure it’s plain and unsweetened.
How often can I give my dog this ice cream?
Consider it an occasional treat rather than a daily snack. Moderation is key to maintaining a balanced diet and avoiding any digestive upset from too much dairy or peanut butter.
Can I add other flavors to the Homemade Dog Ice Cream Recipe?
Absolutely! You can mix in dog-friendly ingredients like pumpkin puree or blueberries to create fun flavor variations. Just avoid anything toxic to dogs like chocolate, grapes, or xylitol.
What if my dog doesn’t like cold treats?
Some dogs may prefer their treats at room temperature. You can let the ice cream sit out for a few minutes before serving or even mash the frozen cubes and mix them with your dog’s regular food.
Final Thoughts
This Homemade Dog Ice Cream Recipe is such a wonderful way to bring a little extra joy to your dog’s day. It’s simple, natural, and tailored especially for your best friend’s tastes and needs. I hope you give it a try and enjoy watching your pup’s delighted reactions as much as I do. Cheers to happy, healthy, and cool pups everywhere!
Print
Homemade Dog Ice Cream Recipe
- Prep Time: 10 minutes
- Cook Time: 2 hours (freezing time)
- Total Time: 2 hours 10 minutes
- Yield: 12 servings
- Category: Dessert
- Method: Blending
- Cuisine: American
Description
A simple and healthy homemade dog ice cream recipe made with ripe bananas, plain Greek yogurt, and unsweetened peanut butter. This creamy frozen treat is perfect for keeping your furry friend cool and refreshed during warm days and is safe for dogs since it avoids harmful sweeteners like xylitol.
Ingredients
Ingredients
- 2 ripe bananas
- 1 cup plain Greek yogurt
- 1/2 cup peanut butter (unsweetened and xylitol-free)
- 1/4 cup water
Instructions
- Blend the Ingredients: In a blender or food processor, combine the ripe bananas, plain Greek yogurt, unsweetened and xylitol-free peanut butter, and water. Blend until the mixture is smooth and creamy, ensuring no large lumps remain.
- Fill the Molds: Pour the blended mixture into ice cube trays or silicone molds. Using molds shaped like bones or paw prints can make serving more fun and attractive for your dog.
- Freeze: Place the filled molds in the freezer and allow them to freeze for at least 2 hours, or until the mixture is solidified into ice cream cubes.
- Serve: Once fully frozen, pop the dog ice cream cubes out of the molds and serve them as a delightful and cool treat to your dog.
Notes
- Ensure peanut butter used is free of xylitol, which is toxic to dogs.
- This recipe is best served immediately after freezing to maintain freshness.
- Store any leftover ice cream in an airtight container in the freezer for up to one week.
- If your dog has dietary restrictions, consult your vet before introducing new ingredients.
- You can customize the recipe by adding dog-safe fruits like blueberries for extra flavor and antioxidants.
