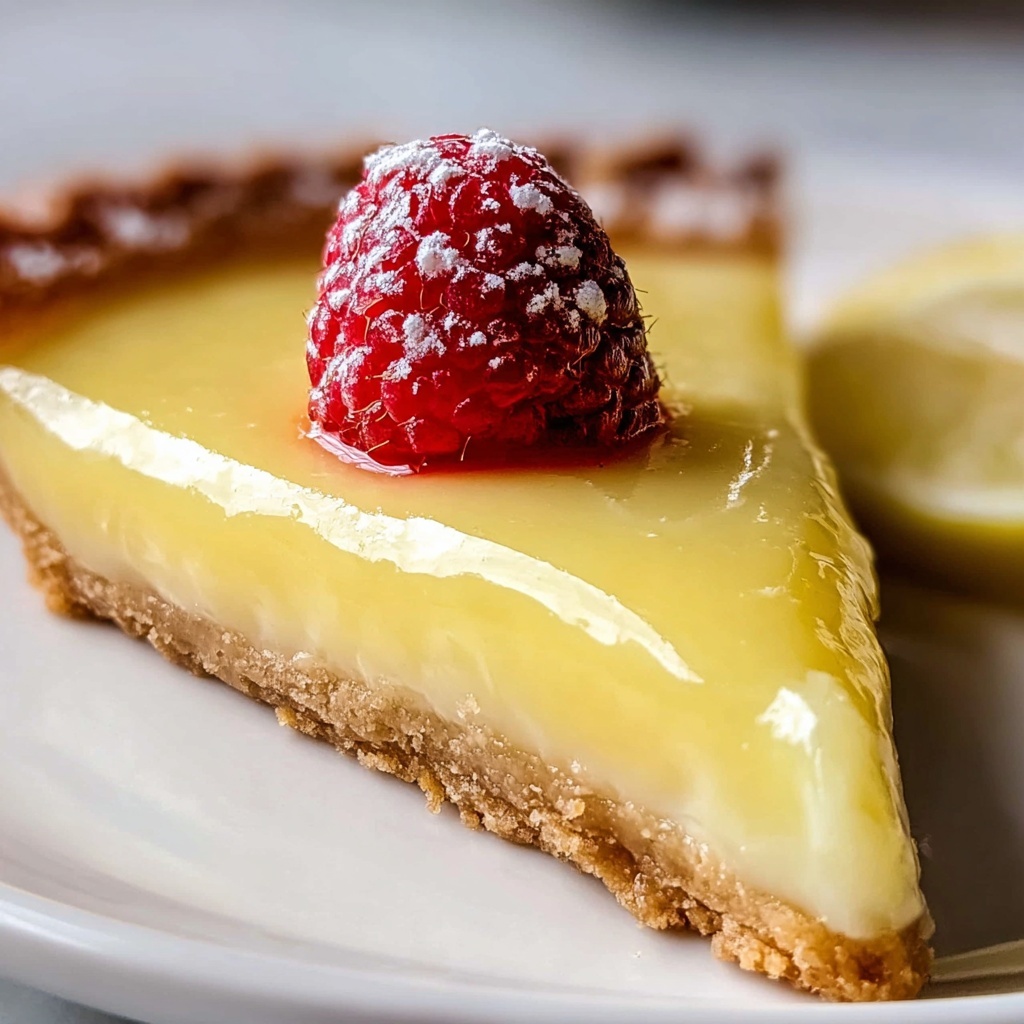
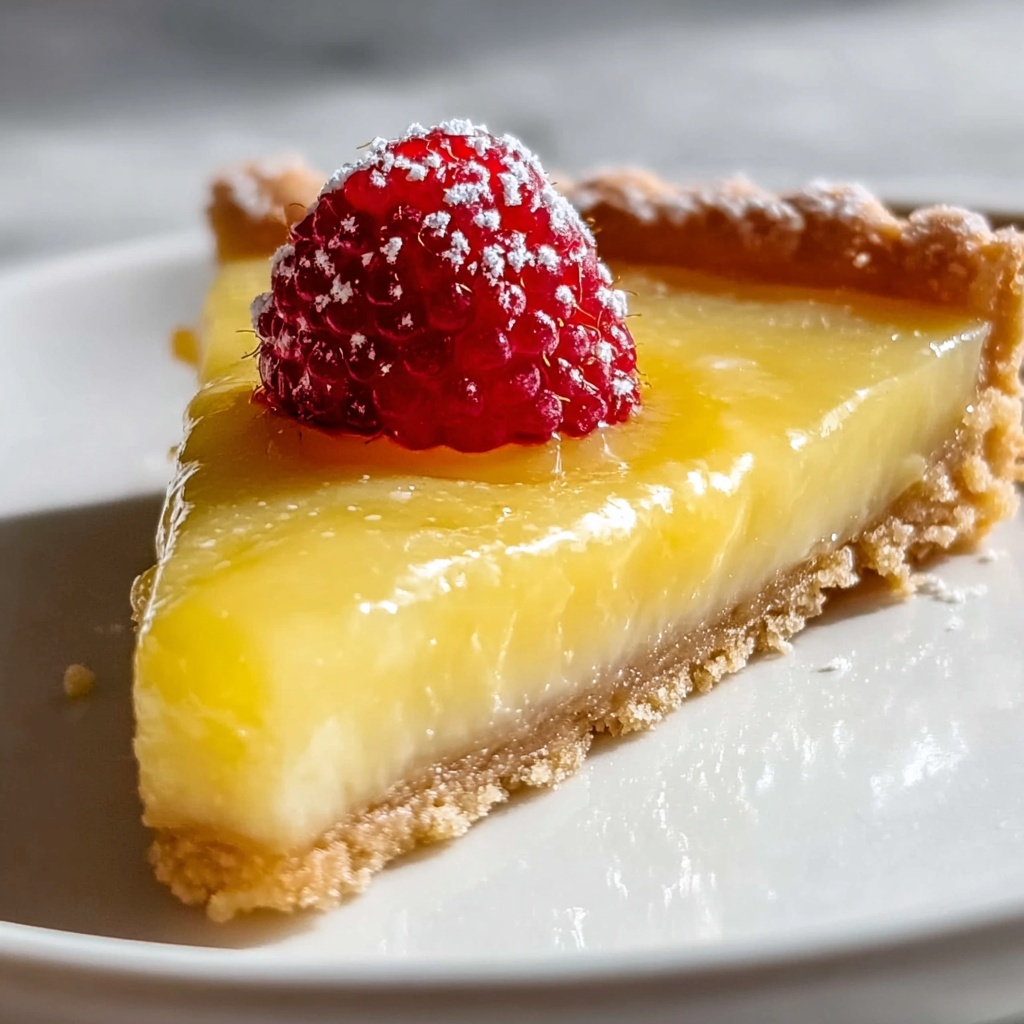
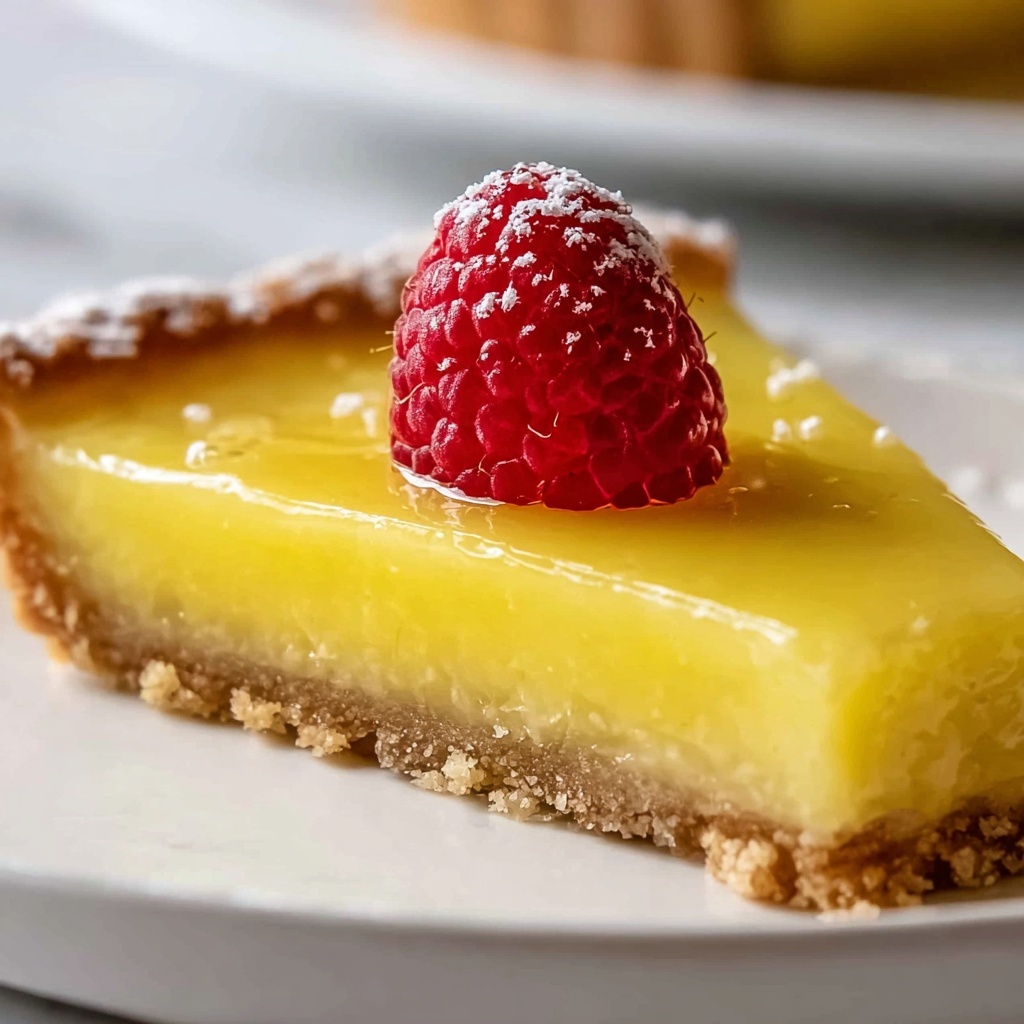
If you’re in the mood for a dessert that perfectly balances zesty brightness with a luscious, creamy texture, then this Perfect Lemon Tart Recipe is about to become your new favorite indulgence. Every bite delivers a delightful contrast between a buttery, crisp crust and a silky lemon filling that’s vibrant but never overpowering. Whether you’re making it for a special occasion or simply craving something refreshingly sweet, this tart promises to brighten your day and brighten your dessert menu with ease and elegance.
Ingredients You’ll Need
Gathering the right ingredients is the first step to crafting this exquisite tart. Each element—simple yet essential—plays its part, from the flaky crust that cradles the filling to the tangy lemon that sets the vibrant tone. The balance of sugar, butter, and cream will ensure both smoothness and richness in every slice.
- All-purpose flour: Forms the base of a tender, flaky crust that holds the filling perfectly.
- Granulated sugar: Adds the sweetness subtle enough to complement but never overpower the lemon.
- Salt: Enhances all the flavors and balances the sweetness.
- Unsalted butter: Cold, to create that perfect crumbly texture in the crust and richness in the filling.
- Large egg yolk: Binds the crust ingredients and enriches the filling’s texture.
- Ice water: Keeps the dough tender while helping it come together smoothly.
- Cornstarch: Thickens the lemon filling, giving it a beautiful silky finish.
- Lemon juice: Freshly squeezed for bright, natural citrus flavor that defines the tart.
- Lemon zest: Adds aromatic oils that elevate the lemon essence with subtle complexity.
- Heavy cream: Whipped to fluffy perfection to top the tart with a light, complementary touch.
- Vanilla extract: Infuses the whipped cream with warmth and depth.
- Fresh berries (optional): Offer a colorful, fresh garnish that elevates presentation and flavor contrast.
How to Make Perfect Lemon Tart Recipe
Step 1: Prepare the Crust
Start by combining the flour, sugar, and salt in a mixing bowl to create the dry foundation. Cut in cold butter until the mixture looks like coarse crumbs; this is the secret to that irresistible flakiness. Add the egg yolk and ice water gradually, mixing just until the dough holds together. Wrap it tightly and chill for an hour—this resting time lets the dough firm up and prevents shrinkage during baking.
Step 2: Bake the Crust
Preheat your oven to 375°F (190°C). Roll out the dough and press it into a 9-inch tart pan; trimming any excess ensures clean edges. Chill the crust again for 20 minutes—this step keeps it from puffing up during baking. Line it with parchment and fill with pie weights or dried beans, then bake for 20 minutes. Remove the weights to bake another 5-10 minutes until the crust has a gorgeous golden brown shade. Allow it to cool completely before filling.
Step 3: Make the Lemon Filling
In a saucepan, whisk together sugar, cornstarch, flour, and salt for a smooth, lump-free base. Slowly add water while stirring continuously and cook over medium heat until the mixture thickens, about 3-5 minutes. Lower the heat and whisk in the egg yolks, cooking for an additional two minutes to cook the eggs through. Off the heat, stir in the butter, fresh lemon juice, and lemon zest. This warm filling instantly develops its luscious texture and dazzling citrus flavor.
Step 4: Assemble and Chill
Pour the warm lemon filling into your cooled crust, smoothing the surface with a spatula for an even top. Refrigerate for at least four hours until the filling sets completely firm, delivering a sliceable yet creamy consistency that melts in your mouth.
Step 5: Prepare the Whipped Cream
Whip together the heavy cream, sugar, and vanilla extract until stiff peaks form. This fluffy topping provides a light, airy contrast to the tangy lemon filling and adds a luxe, inviting touch to your tart.
Step 6: Serve Your Perfect Lemon Tart Recipe
Decorate the chilled tart with dollops or a beautiful swirl of whipped cream and scatter fresh berries on top if you like—a simple step that transforms the tart into a showstopper dessert.
How to Serve Perfect Lemon Tart Recipe
Garnishes
Besides the classic whipped cream and berries, consider zesting a little extra lemon over the top or adding thin slices of candied lemon peel to elevate both flavor and appearance. Mint leaves add an unexpected fresh burst and a splash of green that looks stunning against the bright yellow.
Side Dishes
This lemon tart pairs beautifully with a light afternoon tea or coffee. If you want to serve it as part of a dessert spread, delicate shortbread cookies or a scoop of vanilla ice cream complement the tart without competing with its vibrant lemon flavor.
Creative Ways to Present
Why not serve individual portions in mini tartlet pans for a personal touch? Alternatively, assemble a layered dessert cup with tart slices, whipped cream, and berries. These creative presentations make the Perfect Lemon Tart Recipe both visually exciting and convenient for guests.
Make Ahead and Storage
Storing Leftovers
Wrap any leftover tart tightly with plastic wrap or store in an airtight container to keep the crust crisp and the filling fresh. Refrigerate for up to 3 days—this gives you time to enjoy every slice without rushing.
Freezing
While you can freeze the tart, it’s best to freeze the crust and lemon filling separately before assembly. This prevents any sogginess and keeps textures intact. Thaw overnight in the fridge and assemble fresh for the best flavor and mouthfeel.
Reheating
The Perfect Lemon Tart Recipe is generally enjoyed chilled, so reheating isn’t typically necessary. If you prefer it slightly warmed, a short stint at room temperature or a quick zap in the microwave (wrapped loosely) can soften it without compromising texture.
FAQs
Can I use bottled lemon juice instead of fresh?
Fresh lemon juice truly makes a difference in flavor and brightness for the filling. Bottled juice might work in a pinch but often lacks the vibrant freshness that makes this tart so special.
Is there a gluten-free version of this tart crust?
Yes! You can substitute the all-purpose flour with a gluten-free flour blend, preferably one designed for baking. Just be mindful that the texture might be slightly different, but it will still be delicious.
How long does the lemon tart need to chill?
At least four hours in the refrigerator is essential for the filling to fully set. If possible, chilling overnight improves the flavor melding and firm texture.
Can I make the crust ahead of time?
Absolutely! You can prepare and bake the crust a day in advance. Keep it wrapped tightly until you’re ready to fill it, which helps keep it crisp and fresh.
What’s the best way to prevent the crust from shrinking?
Chilling the dough before rolling out, chilling the crust in the tart pan before baking, and using pie weights during the first bake all work together to reduce shrinkage and maintain the tart’s perfect shape.
Final Thoughts
There’s something truly satisfying about mastering the Perfect Lemon Tart Recipe—a harmonious balance of tart and sweet, crisp and creamy. This recipe brings that balance to your kitchen with straightforward steps and ingredients you probably already have. Give it a whirl, share it with friends, and get ready for the compliments to roll in. You’re about to discover a new favorite dessert that’s just as impressive as it is delicious!
Print
Perfect Lemon Tart Recipe
- Prep Time: 30 minutes
- Cook Time: 30 minutes
- Total Time: 4 hours 45 minutes
- Yield: 8 servings
- Category: Dessert
- Method: Baking
- Cuisine: French
Description
This Perfect Lemon Tart recipe features a buttery, crisp tart crust filled with a smooth, tangy lemon curd made from fresh lemon juice and zest. The tart is topped with a fluffy vanilla whipped cream and optionally garnished with fresh berries, making it a delightful and elegant dessert perfect for any occasion. The recipe requires some chilling and baking time but results in a beautifully balanced, classic lemon tart bursting with bright citrus flavor.
Ingredients
For the Crust
- 1 cup all-purpose flour
- 2½ tbsp granulated sugar
- ¼ tsp salt
- 6 tbsp cold unsalted butter, cut into pieces
- 1 large egg yolk
- 4 tsp ice water
For the Lemon Filling
- 1¼ cups granulated sugar
- ⅓ cup cornstarch
- 2 tbsp all-purpose flour
- ½ tsp kosher salt
- 5 large egg yolks
- ¼ cup unsalted butter
- ¼ cup fresh lemon juice
- 1 tbsp lemon zest
- 1¼ cups water (to add slowly during cooking)
For the Whipped Cream
- 1¼ cups heavy cream
- 2 tbsp granulated sugar
- 1 tsp vanilla extract
For Garnish (Optional)
- Fresh berries
Instructions
- Prepare the Crust: In a bowl, whisk together the flour, sugar, and salt. Add the cold butter and use a pastry cutter or your fingers to mix until the mixture resembles coarse crumbs. Stir in the egg yolk and ice water until the dough just comes together. Wrap the dough in plastic wrap and chill it in the refrigerator for 1 hour to firm up.
- Bake the Crust: Preheat your oven to 375°F (190°C). Roll out the chilled dough and press it evenly into a 9-inch tart pan, trimming any excess dough from the edges. Chill the dough-lined pan in the refrigerator for 20 minutes to prevent shrinking during baking. Line the crust with parchment paper and fill with pie weights. Bake for 20 minutes, then remove the weights and parchment and bake for an additional 5 to 10 minutes until the crust is golden brown. Remove from the oven and allow it to cool completely.
- Make the Filling: In a medium saucepan, whisk together the sugar, cornstarch, flour, and kosher salt. Slowly whisk in the water to combine smoothly. Cook the mixture over medium heat, stirring constantly, until it thickens to a pudding-like consistency, about 3 to 5 minutes. Lower the heat and whisk in the egg yolks, cooking for an additional 2 minutes while stirring continuously to avoid curdling. Remove the pan from heat and immediately stir in the butter, fresh lemon juice, and lemon zest until the filling is smooth and glossy.
- Assemble the Tart: Pour the warm lemon filling into the cooled tart crust, spreading it evenly. Smooth the surface with a spatula and refrigerate the tart for at least 4 hours to allow the filling to fully set and chill.
- Prepare the Whipped Cream: In a mixing bowl, beat the heavy cream, sugar, and vanilla extract together until stiff peaks form, creating a light and fluffy whipped cream topping.
- Serve: Once the tart is fully chilled and set, top it generously with the whipped cream. Garnish with fresh berries if desired for extra color and flavor. Slice and enjoy this refreshing, luscious lemon tart dessert.
Notes
- Ensure the butter for the crust is very cold for a flaky, tender texture.
- Chilling the crust before baking helps prevent shrinking and maintains its shape.
- Constant stirring during the filling preparation is crucial to avoid lumps and curdling the eggs.
- The tart must chill for at least 4 hours for the filling to set properly.
- Fresh lemon juice and zest provide the best bright, natural citrus flavor.
- This tart is best served chilled and consumed within 2 days for optimal freshness.
- Optional fresh berries add a lovely visual contrast and extra freshness.


